

Getting started with fitness doesn’t have to be complicated, expensive, or intimidating.
In fact, some of the most effective exercises you can do require no gym membership, no fancy equipment, and very little space.
If you’re a beginner, building a strong fitness foundation at home with full body workouts is one of the best ways to burn calories, strengthen muscles, and boost energy — all without stepping foot in a gym.
Full body workouts are perfect for beginners because they target all major muscle groups in a single session — your arms, chest, back, core, and legs.
This balanced approach helps you build strength evenly, improve posture, and increase endurance.
Plus, since you’re engaging multiple muscle groups at once, you burn more calories in less time — making full body training one of the most time-efficient workout methods.
The best part? You don’t need to spend hours exercising. With just 15–30 minutes a day, you can start seeing improvements in your stamina, body strength, and overall fitness.
These beginner-friendly routines focus on simple, low-impact exercises that are easy to follow, safe for joints, and require little to no prior experience.
Over time, they’ll help you gain confidence and prepare your body for more advanced workouts.
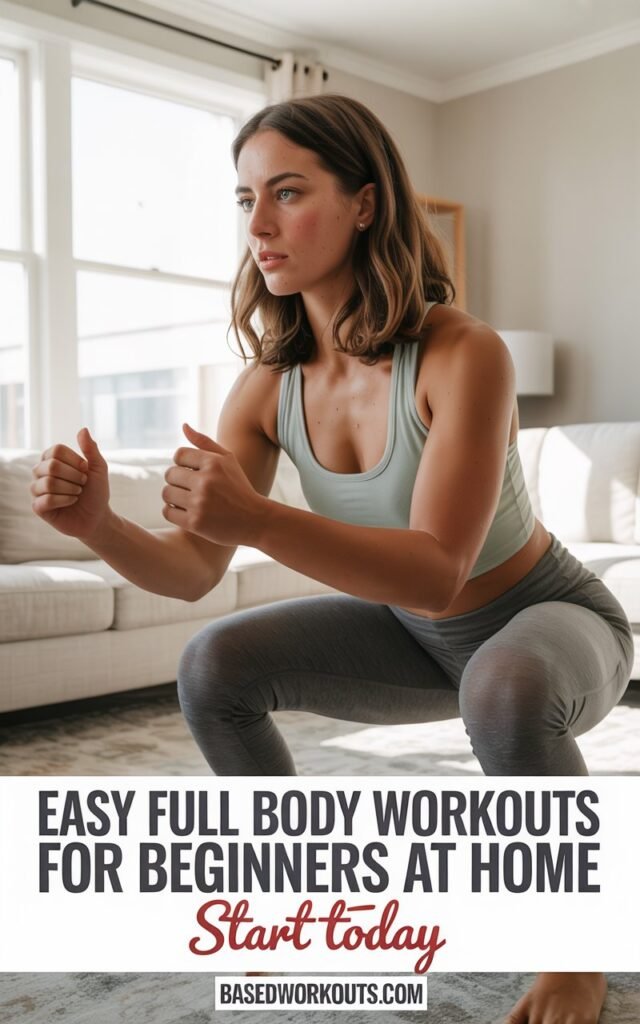
Whether your goal is to lose weight, tone your body, or just get moving, these 10 easy full body workouts will give you the perfect starting point.
You can do them in your living room, bedroom, or even outdoors — all you need is some motivation and consistency.
In this guide, we’ll cover:
- Beginner-friendly full body exercises you can start today
- How to structure your at-home workouts for the best results
- Tips to stay consistent and avoid common mistakes
- Variations to make workouts easier or more challenging
By the end, you’ll have a complete at-home workout routine that’s not only effective but also fun and sustainable.
So, grab a water bottle, clear some space, and get ready to kickstart your fitness journey with these 10 easy full body workouts for beginners at home.
Amazon Gear: Beginner Home Workout Essentials for Full-Body Fitness
Want to Get Fit Without the Gym?
These affordable, beginner-friendly tools make full-body workouts at home easier, more fun, and more effective — no expensive setup required.
Here are my top Amazon picks for getting started strong:
| Product | Why You’ll Love It | Shop Now |
|---|---|---|
| Resistance Bands Set (with Handles & Door Anchor) | Great for total-body training — tone arms, legs, and core with adjustable resistance. | Check Price on Amazon |
| Adjustable Dumbbells (Compact Design) | Perfect for all fitness levels and small spaces — ideal for strength and toning. | View on Amazon |
| Non-Slip Yoga / Exercise Mat | Essential for floor workouts, stretching, and core exercises. | Shop Now |
| Kettlebell Set (Vinyl-Coated) | Adds variety to your workouts and builds strength, stability, and endurance. | Buy on Amazon |
| Jump Rope (Adjustable Speed Rope) | Simple but powerful cardio tool for calorie burning and coordination. | See Details |
| Stability Ball (Anti-Burst) | Great for core exercises, flexibility, and posture improvement. | Shop Now |
| Ankle Weights (Adjustable) | Adds resistance to leg lifts, squats, and glute workouts for faster toning. | View on Amazon |
| Foam Roller (High-Density) | Helps with recovery, mobility, and easing post-workout soreness. | Check Price on Amazon |
| Workout Timer / Interval Clock | Keeps you on track during sets, circuits, and rest periods. | View on Amazon |
| Water Bottle (Insulated, BPA-Free) | Stay hydrated through every rep and session. | Shop Now |
These Amazon home workout essentials are perfect for beginners who want to get stronger, fitter, and more confident — all from the comfort of home.
Warm-Up: Preparing Your Body for Exercise
A proper warm-up is essential for maximizing workout performance and preventing injuries.
Think of it as giving your muscles, joints, and cardiovascular system a gentle “wake-up call” before challenging them with more intense exercises.
Warming up increases blood flow, raises body temperature, and primes your nervous system, ensuring your body is ready to move safely and efficiently.
Benefits of a Good Warm-Up
- Reduces risk of injury – Loosens muscles and joints to prevent strains or sprains.
- Enhances performance – Prepares muscles for strength, endurance, and explosive movements.
- Improves flexibility and mobility – Gently stretches muscles and tendons, increasing range of motion.
- Boosts mental focus – Gives you time to get in the right mindset for your workout.
- Activates key muscle groups – Engages muscles you’ll use in your main workout, improving efficiency.
Effective Warm-Up Routine (5–10 Minutes)
- Light Cardio (2–3 minutes) – Jog in place, do jumping jacks, or march to get your heart rate slightly elevated.
- Dynamic Stretching (2–3 minutes) – Arm circles, leg swings, torso twists, and hip rotations to mobilize joints.
- Movement Prep (1–3 minutes) – Perform bodyweight versions of your workout moves, such as squats, lunges, or push-ups, to engage the muscles you’ll train.
Tips for a Safe Warm-Up
- Start slowly and gradually increase intensity.
- Focus on controlled movements rather than speed.
- Include muscle groups you plan to target in your main workout.
- Avoid static stretching (holding a stretch for a long time) before high-intensity exercises—it can temporarily reduce strength.
1. Seated Leg Raises for Abdominal Toning
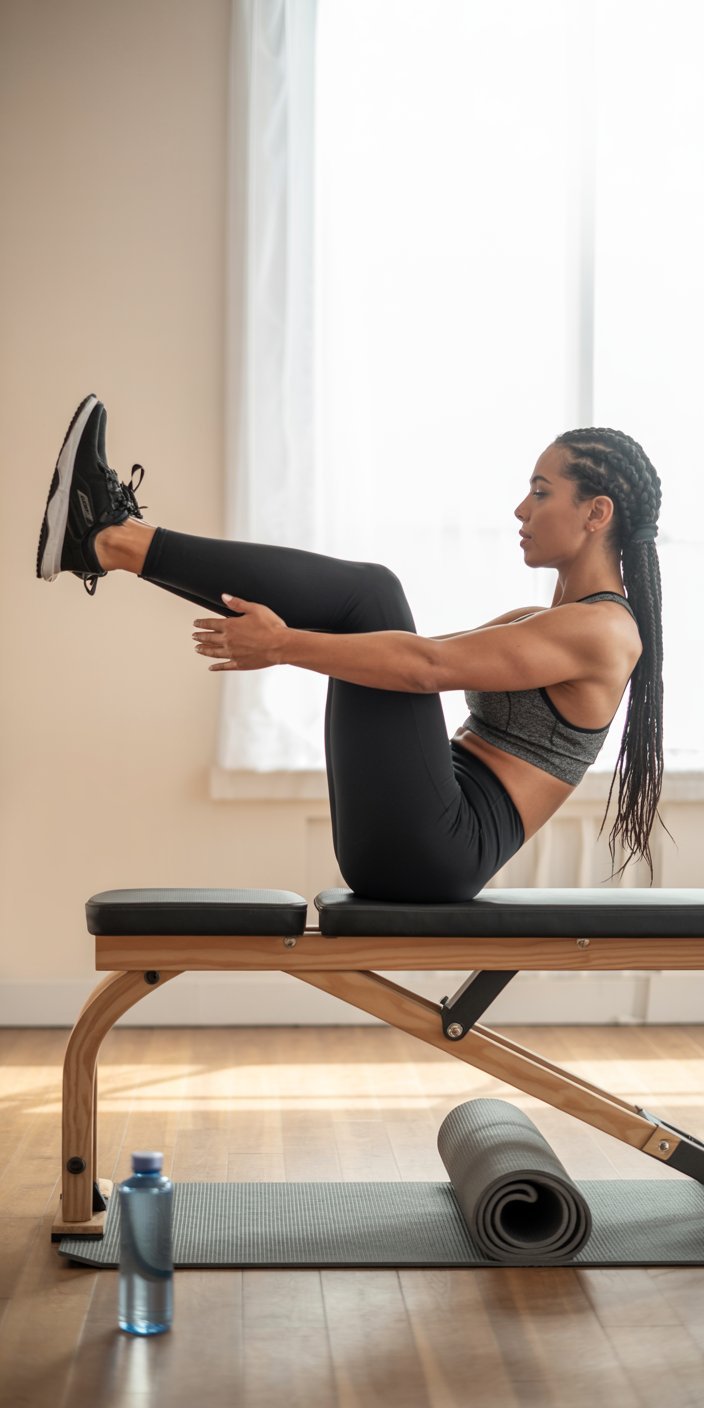
Seated leg raises are a highly effective core exercise that primarily targets the lower abs while also engaging the hip flexors and obliques.
Unlike traditional crunches, this move emphasizes controlled leg movement, helping to sculpt a tighter, more toned midsection without straining the neck or back.
It’s perfect for home workouts, beginners, or anyone looking to strengthen the lower core.
Benefits of Seated Leg Raises
- Targets lower abs – Focuses on one of the most challenging areas to tone.
- Strengthens hip flexors – Improves balance, posture, and leg control.
- Engages core stabilizers – Supports the lower back and improves functional strength.
- Reduces risk of injury – A controlled, low-impact movement that’s gentle on the spine.
- Enhances athletic performance – Helps with running, jumping, and dynamic movements.
How to Perform Seated Leg Raises
- Sit on the edge of a sturdy chair or bench with your hands gripping the sides for support.
- Keep your back straight and core engaged.
- Lift both legs straight out in front of you until they’re parallel to the floor.
- Pause briefly at the top, squeezing your lower abs.
- Lower your legs slowly without letting them touch the floor.
- Repeat for 10–20 controlled reps per set.
Tips for Proper Form
- Avoid leaning back or arching your spine—keep your torso upright.
- Move slowly and deliberately; control is more important than speed.
- Exhale as you lift your legs, inhale as you lower them.
- If straight legs are too challenging, bend your knees slightly.
Variations of Seated Leg Raises
- Single-Leg Raise – Lift one leg at a time to increase intensity and focus.
- Weighted Leg Raise – Add ankle weights for progressive resistance.
- Seated Knee Tucks – Bring knees toward your chest for a dynamic variation.
- Seated Oblique Leg Raises – Twist slightly to each side to engage obliques.
How Many to Do
- Beginners: 2–3 sets of 8–12 reps.
- Intermediate: 3–4 sets of 12–15 reps.
- Advanced: 4–5 sets of 15–20 reps or add ankle weights for extra challenge.
Seated leg raises are a simple yet powerful move for strengthening the lower abs, improving core stability, and supporting better posture.
Adding them to your routine regularly will help you build a toned and resilient midsection.
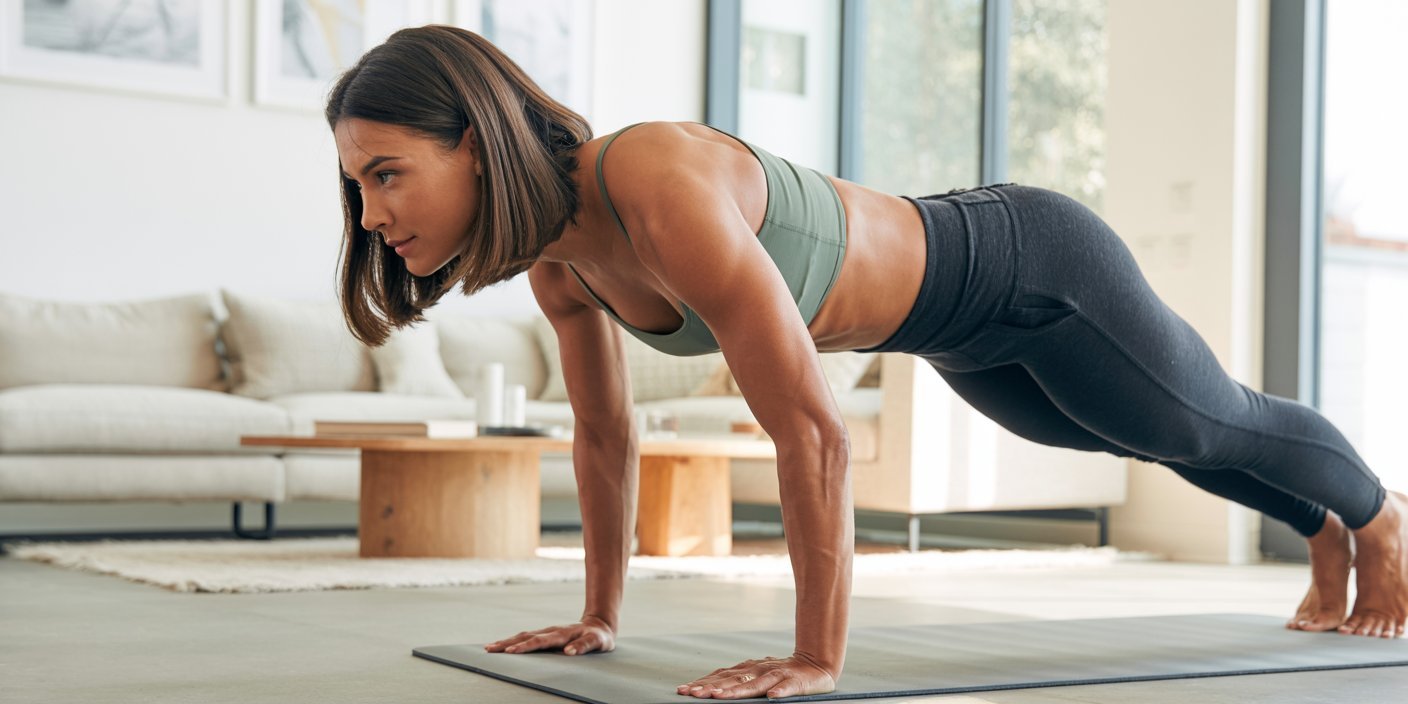
2. Plank Position for Core Stability
The plank is one of the most effective and versatile core exercises you can perform without equipment.
Unlike traditional crunches that mainly target the abs, planks engage your entire core unit—including the abs, obliques, lower back, hips, and even shoulders.
This makes it a go-to move for building core stability, improving posture, and preventing injuries.
Benefits of the Plank
- Strengthens your core – Builds endurance in your abs, obliques, and lower back.
- Improves posture – Encourages proper spinal alignment.
- Enhances balance and stability – Helps in daily movements and sports performance.
- Prevents injuries – A strong core reduces strain on the spine and joints.
- Boosts calorie burn – Engages multiple muscles at once, raising energy expenditure.
How to Perform a Standard Plank
- Start on all fours with your hands under your shoulders.
- Step your feet back until your body forms a straight line from head to heels.
- Keep your core engaged by pulling your belly button toward your spine.
- Squeeze your glutes and avoid letting your hips sag or lift too high.
- Keep your neck neutral by looking slightly ahead of your hands.
- Hold for 20–60 seconds, depending on your fitness level.
Tips for Proper Form
- Don’t arch your lower back—keep your torso tight.
- Spread your fingers for a stable base.
- Keep breathing—don’t hold your breath.
- Quality over quantity: It’s better to hold a perfect plank for 20 seconds than a sloppy one for a minute.
Variations of the Plank
- Forearm Plank – Rest on your forearms instead of your hands to reduce wrist strain.
- Side Plank – Balances on one arm, engaging obliques and hips more.
- Plank with Shoulder Taps – Tap each shoulder with the opposite hand to challenge stability.
- Plank Jacks – Jump feet in and out while holding the plank for a cardio boost.
- Walking Plank – Move from forearms to hands repeatedly for strength and endurance.
How Many to Do
- Beginners: 2–3 sets of 20–30 seconds.
- Intermediate: 3–4 sets of 30–60 seconds.
- Advanced: 4–5 sets of 60+ seconds or weighted planks.
Planks are a foundational core exercise that should be part of every fitness routine. Just a few minutes of planking per day can dramatically improve your strength, stability, and overall fitness performance.
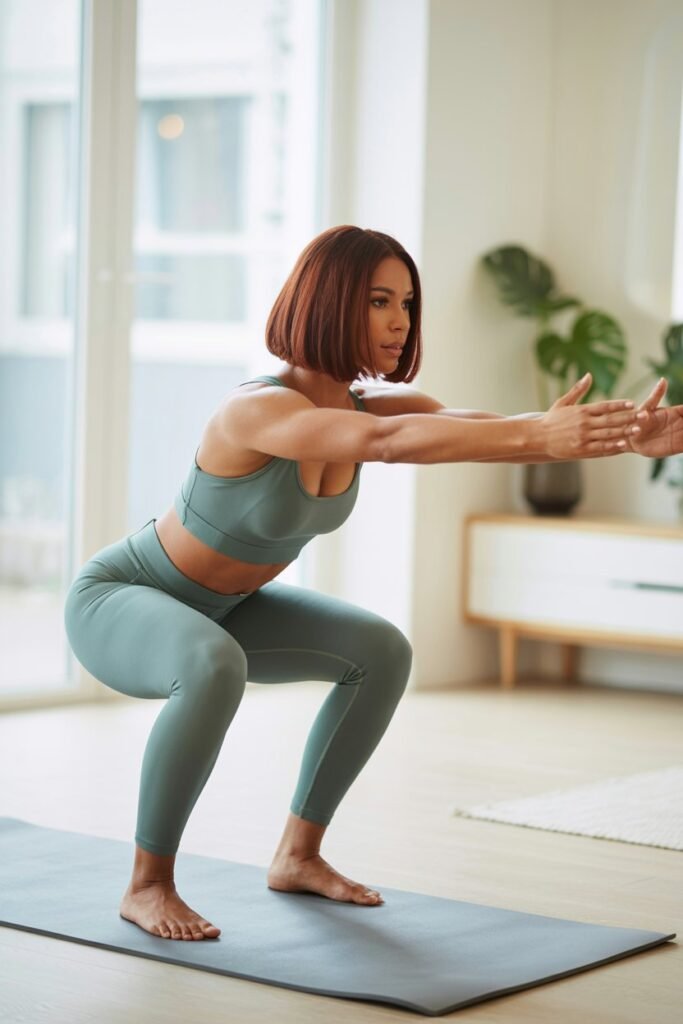
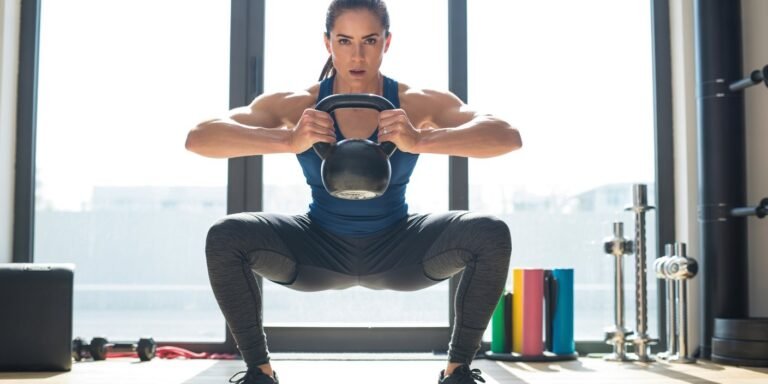
3. Bodyweight Squats for Leg Strength
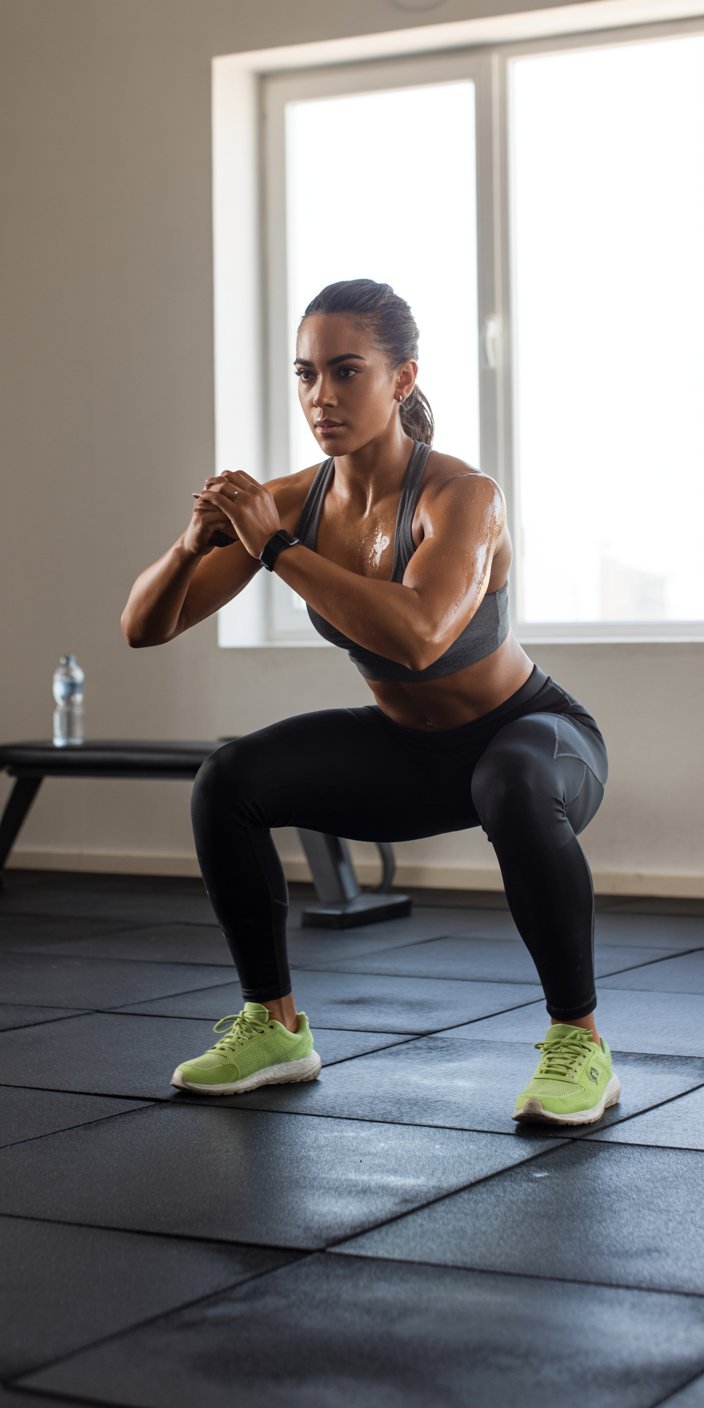
Bodyweight squats are one of the most effective lower-body exercises you can do without any equipment.
They strengthen the quadriceps, hamstrings, glutes, and calves, while also engaging your core and lower back for stability.
Whether you’re a beginner or an experienced fitness enthusiast, squats are a foundational movement that supports everyday activities like sitting, standing, and climbing stairs.
Benefits of Bodyweight Squats
- Strengthens lower-body muscles – Builds power in the legs and glutes.
- Improves mobility and flexibility – Opens up tight hips and ankles.
- Enhances balance and coordination – Trains stabilizing muscles for better movement.
- Boosts calorie burn – A compound exercise that activates multiple large muscle groups.
- Supports athletic performance – Essential for running, jumping, and explosive movements.
How to Perform Bodyweight Squats (Step-by-Step)
- Stand tall with your feet shoulder-width apart, toes slightly turned outward.
- Engage your core and keep your chest lifted.
- Lower your body by bending your knees and pushing your hips back, as if sitting in a chair.
- Go down until your thighs are parallel to the floor (or as far as your mobility allows).
- Press through your heels to return to the starting position.
- Repeat for your desired number of reps.
Tips for Proper Form
- Keep your knees in line with your toes—don’t let them cave inward.
- Maintain a neutral spine (don’t round your back).
- Look forward, not down, to help keep your posture upright.
- Control your movement—avoid bouncing at the bottom.
Variations of Bodyweight Squats
- Jump Squats – Add a jump at the top for cardio and explosive power.
- Pulse Squats – Stay low and pulse for extra burn.
- Narrow Squats – Feet closer together to target inner thighs.
- Wide/Stance Squats (Sumo Squats) – Works more of the inner thighs and glutes.
- Single-Leg Squats (Pistol Squats) – Advanced variation for strength and balance.
How Many to Do
- Beginners: 2–3 sets of 10–12 reps.
- Intermediate: 3–4 sets of 15–20 reps.
- Advanced: 4–5 sets of 20+ reps or plyometric variations (like jump squats).
Bodyweight squats are a must-have exercise for anyone looking to build strong, toned legs and glutes. Add them to your workouts 2–4 times per week for the best results.
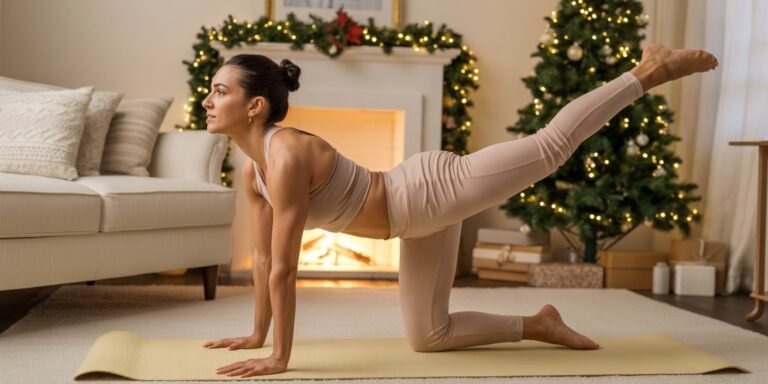
4. Glute Bridges for Lower Body Strength
Glute bridges are a fundamental lower-body exercise that primarily target the glutes, hamstrings, and core while also engaging the lower back and hip stabilizers.
This move is excellent for beginners and advanced exercisers alike, as it helps build strength, improve posture, and enhance overall athletic performance.
Plus, it can be done anywhere—no equipment required.
Benefits of Glute Bridges
- Strengthens glutes and hamstrings – Helps build a firm and strong lower body.
- Improves hip mobility – Counteracts the effects of sitting for long hours.
- Supports lower back health – Activates the posterior chain to reduce back pain risk.
- Enhances posture – Strengthens muscles that stabilize the pelvis and spine.
- Boosts athletic performance – Improves sprinting, jumping, and lifting power.
How to Perform Glute Bridges
- Lie flat on your back with your knees bent and feet hip-width apart, flat on the floor.
- Place your arms at your sides, palms facing down for support.
- Engage your core and squeeze your glutes as you lift your hips toward the ceiling.
- Continue lifting until your body forms a straight line from shoulders to knees.
- Hold briefly at the top, then slowly lower your hips back down to the floor.
- Repeat for the desired number of reps.
Tips for Proper Form
- Keep your feet flat and press evenly through your heels.
- Avoid arching your lower back—lift using your glutes, not your spine.
- Exhale as you lift, inhale as you lower.
- Squeeze at the top for maximum glute engagement.
Variations of Glute Bridges
- Single-Leg Glute Bridge – Extend one leg while lifting hips for added challenge.
- Elevated Glute Bridge – Place feet on a bench or step for greater range of motion.
- Weighted Glute Bridge – Add a dumbbell or barbell across the hips for resistance.
- Marching Glute Bridge – Alternate lifting each leg while holding the bridge position.
- Banded Glute Bridge – Place a resistance band above your knees to activate hip abductors.
How Many to Do
- Beginners: 2–3 sets of 10–12 reps.
- Intermediate: 3–4 sets of 15–20 reps.
- Advanced: 4–5 sets of 20+ reps or weighted variations.
Glute bridges are a simple yet powerful move that builds strength in your lower body, improves balance, and prevents injury.
Incorporating them into your routine consistently will help you sculpt strong glutes and a more stable core.
5. Mountain Climbers for Cardio and Core
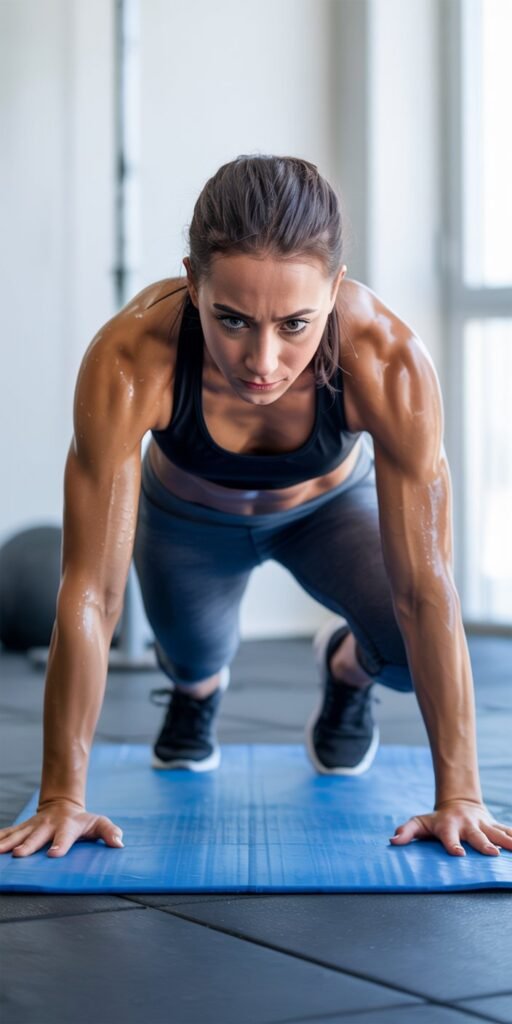
Mountain climbers are a high-intensity, full-body exercise that combines cardio training with core strengthening.
This move mimics the motion of running while in a plank position, making it perfect for burning calories, building endurance, and tightening your midsection all at once.
Benefits of Mountain Climbers
- Cardio boost – Elevates your heart rate quickly for fat-burning.
- Core activation – Strengthens the abs, obliques, and lower back.
- Full-body workout – Engages shoulders, chest, arms, and legs.
- Improves agility – Helps with speed, coordination, and athletic performance.
- Time-efficient – Provides both cardio and strength training in one move.
How to Perform Mountain Climbers
- Start in a plank position with your hands directly under your shoulders and your body forming a straight line from head to heels.
- Engage your core by pulling your belly button toward your spine.
- Drive your right knee forward toward your chest without letting your hips sag.
- Quickly switch legs, extending the right leg back while bringing the left knee forward.
- Continue alternating legs at a steady pace, like you’re “running” horizontally.
Tips for Proper Form
- Keep your hips low—avoid bouncing them up and down.
- Maintain a flat back to protect your lower spine.
- Breathe steadily instead of holding your breath.
- Start slow to master form before picking up speed.
Variations of Mountain Climbers
- Slow Mountain Climbers – Perform slowly to increase core strength and control.
- Cross-Body Mountain Climbers – Drive knees toward the opposite elbow to target the obliques.
- Spider Mountain Climbers – Bring knees outside toward your elbows to engage the hips and outer core.
- Elevated Mountain Climbers – Place your hands on a bench or step for less pressure on the wrists.
- Explosive Mountain Climbers – Go as fast as possible for a cardio-intensive burst.
How Many to Do
- Beginners: 3 sets of 20–30 seconds at a controlled pace.
- Intermediate: 3–4 sets of 40–60 seconds, pushing intensity.
- Advanced: 4–5 sets of 60–90 seconds or include in a HIIT circuit.
Mountain climbers are one of the most effective fat-burning and core-strengthening moves you can do anywhere.
Incorporate them into your workout for fast results in stamina, core stability, and calorie burn.
6. Lunges to Enhance Leg Muscles
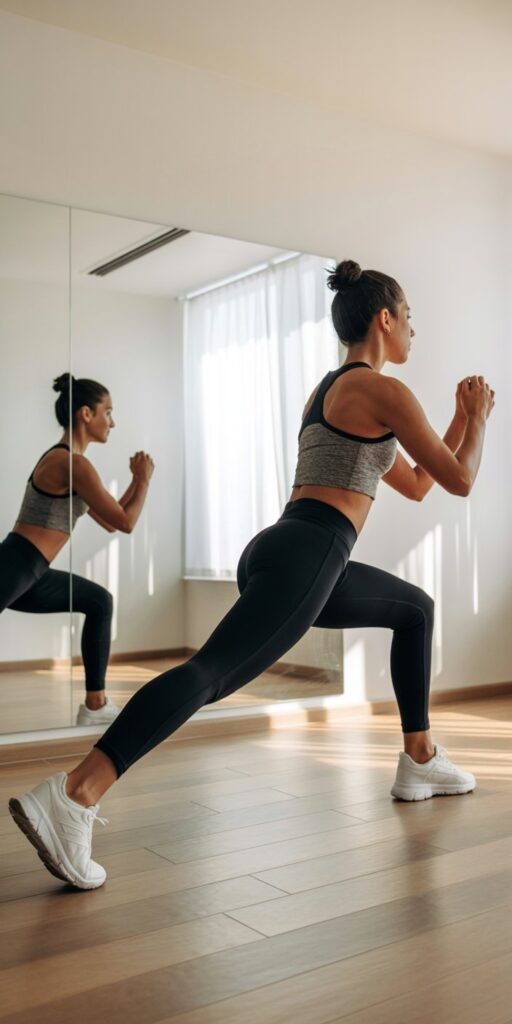
Lunges are a staple lower-body exercise that targets multiple major muscle groups, making them one of the best moves for building strength, balance, and coordination.
This functional exercise mimics real-life movements such as walking, climbing stairs, or bending down, which makes it especially valuable for overall fitness.
Benefits of Lunges
- Targets multiple muscles – Works the quadriceps, hamstrings, glutes, and calves.
- Improves balance and stability – Since lunges are unilateral (one leg works at a time), they strengthen stabilizing muscles.
- Enhances mobility – Lunges stretch and strengthen the hip flexors, which often become tight from sitting too much.
- Boosts core engagement – Keeping balance requires activating your abs and lower back.
How to Perform a Basic Forward Lunge
- Stand tall with your feet hip-width apart.
- Step forward with your right leg, lowering your hips until both knees are bent at about a 90-degree angle.
- The front thigh should be parallel to the ground.
- The back knee should hover just above the floor.
- Push back up through your front heel to return to standing.
- Repeat on the opposite side.
Tips for Proper Form
- Keep your torso upright and avoid leaning forward.
- Don’t let your front knee go past your toes to reduce strain.
- Engage your core to stay stable.
- Perform lunges slowly and with control instead of rushing.
Variations of Lunges
- Reverse Lunge – Step backward instead of forward, easier on the knees.
- Walking Lunge – Step forward continuously, great for endurance.
- Side Lunge – Targets inner thighs and hips.
- Jumping Lunge – Adds a plyometric element for cardio and power.
How Many to Do
- Beginners: 2–3 sets of 8–10 reps per leg.
- Intermediate/Advanced: 3–4 sets of 12–15 reps per leg.
- For fat loss: Perform as part of a circuit with minimal rest.
Lunges are an excellent way to tone your thighs, lift your glutes, and improve athletic performance. Add them to your workout at least twice a week for noticeable results.
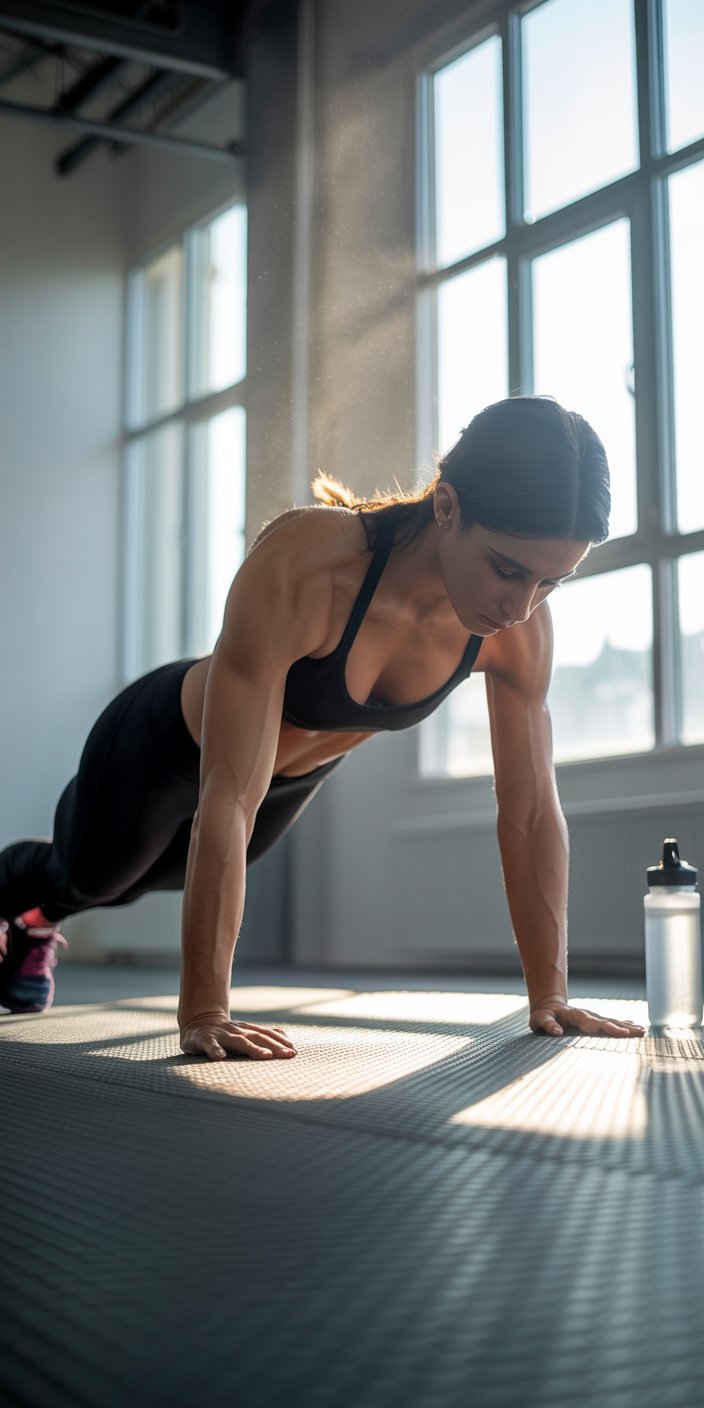
7. Push-Ups for Upper Body Conditioning

Push-ups are one of the most classic and effective bodyweight exercises, targeting multiple muscle groups at once.
This move not only strengthens the chest, shoulders, and triceps but also engages the core and lower body to maintain proper alignment.
Whether you’re a beginner or advanced, push-ups can be modified to suit your fitness level and are a must-have in any strength training routine.
Benefits of Push-Ups
- Upper body strength – Builds chest, shoulder, and tricep muscles.
- Core stability – Keeps the abs, obliques, and lower back engaged.
- Functional fitness – Improves everyday strength and athletic performance.
- No equipment needed – Perfect for at-home or on-the-go workouts.
- Scalable – Easy to progress or regress based on your strength.
How to Perform Push-Ups
- Start in a high plank position with hands placed slightly wider than shoulder-width.
- Keep your body in a straight line from head to heels (don’t let hips sag or rise).
- Lower your chest toward the floor by bending your elbows at about a 45° angle.
- Go as low as you can while keeping form, ideally until your chest is just above the ground.
- Press through your palms to push your body back up to the starting position.
- Repeat for the desired number of reps.
Tips for Proper Form
- Engage your core and glutes to prevent sagging.
- Keep your neck neutral—don’t crane your head forward.
- Inhale as you lower, exhale as you press back up.
- Move slowly and with control for maximum muscle activation.
Variations of Push-Ups
- Knee Push-Ups – Great for beginners building strength.
- Incline Push-Ups – Place hands on a bench or step to reduce difficulty.
- Decline Push-Ups – Elevate feet on a step for more chest and shoulder activation.
- Diamond Push-Ups – Hands close together to target the triceps.
- Wide-Grip Push-Ups – Hands placed farther apart to emphasize the chest.
- Plyometric Push-Ups – Add a clap or explosive movement for power.
How Many to Do
- Beginners: 2–3 sets of 6–10 reps.
- Intermediate: 3–4 sets of 12–20 reps.
- Advanced: 4–5 sets of 20+ reps or add variations for challenge.
Push-ups are a foundation exercise for total upper body strength, and including them regularly will improve not only muscle tone but also endurance and stability.
They’re a powerful move for conditioning and can be done anytime, anywhere without equipment.
8. Bent-Over Rows for Back Strength
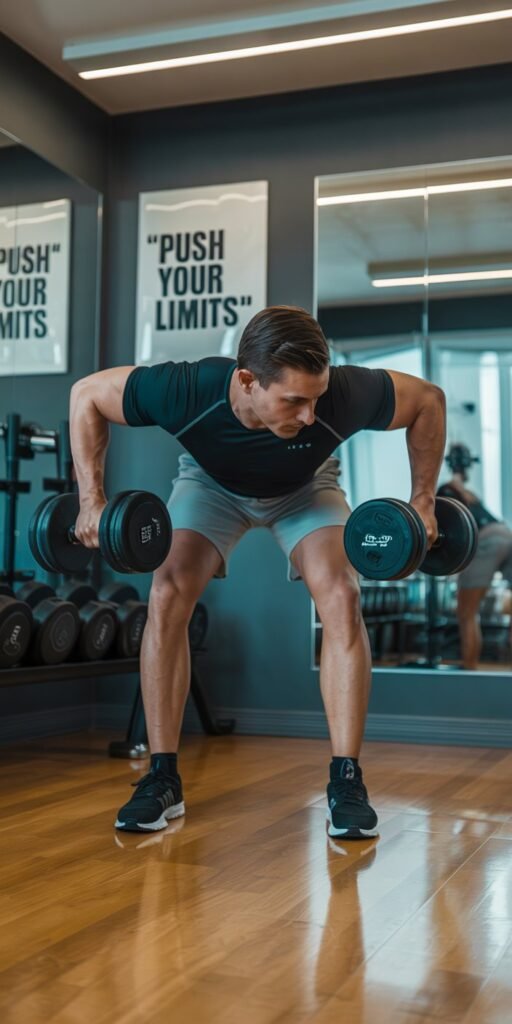
A strong back is the foundation of good posture, athletic performance, and overall strength.
If you want to build a toned, defined upper body and protect yourself from injury, the bent-over row is one of the best exercises you can include in your routine.
This compound movement engages multiple muscles at once, helping you pull heavier, stabilize your core, and balance out all the pushing movements (like push-ups and bench presses) that often dominate workouts.
Muscles Worked in Bent-Over Rows
- Latissimus dorsi (lats): The large muscles on the sides of your back that give it a V-shape.
- Rhomboids & trapezius: Mid- and upper-back muscles that help retract your shoulder blades.
- Rear delts (posterior shoulders): Assist with pulling and improve shoulder balance.
- Biceps & forearms: Work as secondary muscles to help pull the weight.
- Core & spinal stabilizers: Keep your torso steady and protect your lower back.
Together, these muscles improve strength, posture, and aesthetics—making bent-over rows a true powerhouse move.
How to Do Bent-Over Rows (Step-by-Step)
- Set Up: Hold a pair of dumbbells (or a barbell) with palms facing your body. Stand with feet shoulder-width apart.
- Hinge at the Hips: Push your hips back, keeping your knees slightly bent, and lean your torso forward until it’s nearly parallel to the floor. Keep your back flat and core tight.
- Pull the Weight: Row the dumbbells/barbell toward your lower ribcage by driving your elbows back.
- Squeeze: At the top, squeeze your shoulder blades together for 1–2 seconds.
- Lower with Control: Slowly lower the weight back down to the starting position.
- Repeat: Perform 8–15 reps for 3 sets.
Tip: Keep your head in line with your spine—don’t crane your neck.
Form Tips for Better Results
- Avoid rounding your back—keep it flat and strong.
- Drive your elbows back, not out to the sides.
- Don’t use momentum; control the movement.
- Keep your core braced to protect your lower back.
Benefits of Bent-Over Rows
✅ Builds a strong, defined back
✅ Improves posture and reduces slouching
✅ Strengthens pulling power for other lifts
✅ Balances upper-body strength (push vs. pull)
✅ Engages multiple muscle groups at once for efficiency
Variations to Try
- Barbell Bent-Over Row: Great for heavier loads and overall back strength.
- Dumbbell Bent-Over Row: Allows a greater range of motion and helps fix muscle imbalances.
- Single-Arm Dumbbell Row: Focuses on one side at a time for better isolation.
- Underhand-Grip Row: Targets the lower lats and biceps more.
- Resistance Band Row: A beginner-friendly option that’s easy on the joints.
When & How Often to Do Them
- Perform bent-over rows 2–3 times per week as part of your back or full-body workout.
- Pair them with pushing moves (like push-ups or chest presses) for balanced strength.
- Best placed early in your workout when you’re fresh, since it’s a compound lift.
Pro Tips for Faster Progress
- Use progressive overload—gradually increase the weight over time.
- Focus on mind-muscle connection by squeezing your back muscles every rep.
- Mix heavy, low-rep sets (for strength) with lighter, higher-rep sets (for endurance and muscle definition).
- Always prioritize form over weight to prevent back strain.
9. Standing Calf Raises for Lower Leg Strength
When it comes to building balanced, sculpted legs, most people focus on quads, hamstrings, and glutes—but forget about the calves.
Strong calves aren’t just for looks; they play a major role in walking, running, jumping, and overall lower body stability.
One of the simplest yet most effective moves to strengthen your calves is the standing calf raise.
This classic bodyweight exercise is beginner-friendly, requires no equipment, and can be done anywhere.
Over time, it helps build endurance, improve ankle stability, and give your lower legs more definition.
Muscles Worked in Standing Calf Raises
- Gastrocnemius – The larger, visible calf muscle that gives your lower legs their shape.
- Soleus – A deeper calf muscle that builds endurance and stability.
- Tibialis posterior & stabilizers – Help control ankle movement and balance.
Together, these muscles make everyday movements smoother and enhance athletic performance.
How to Do Standing Calf Raises (Step-by-Step)
- Set Up: Stand tall with feet hip-width apart. You can hold onto a wall, chair, or railing for balance.
- Engage Core: Keep your posture upright, shoulders back, and abs tight.
- Lift: Rise up onto the balls of your feet as high as you can, squeezing your calves.
- Pause: Hold the top position for 1–2 seconds for maximum contraction.
- Lower Slowly: Return your heels to the floor with control—don’t just drop down.
- Repeat: Perform 12–20 reps for 3 sets.
Tip: To increase range of motion, stand on a step or sturdy platform with your heels hanging off the edge.
Form Tips for Better Results
- Keep the movement slow and controlled—no bouncing.
- Push through the balls of your feet, not your toes.
- Keep your knees slightly soft, not locked out.
- Squeeze your calves at the top of every rep for maximum activation.
Benefits of Standing Calf Raises
✅ Builds stronger, more defined calves
✅ Improves balance and ankle stability
✅ Boosts jumping power and athletic performance
✅ Reduces risk of ankle and knee injuries
✅ Enhances overall leg aesthetics
Variations to Try
- Single-Leg Calf Raises: Lift one foot off the ground and perform the exercise on one leg at a time.
- Weighted Calf Raises: Hold dumbbells or wear a weighted vest for added resistance.
- Seated Calf Raises: Sit on a bench with weight on your knees to emphasize the soleus muscle.
- Pulse Calf Raises: Perform short, quick pulses at the top for extra burn.
- Explosive Calf Raises: Push up quickly onto your toes to train power and agility.
When & How Often to Do Them
- Add calf raises 2–3 times per week into your leg or full-body workouts.
- They work well as a finisher exercise after squats or lunges.
- You can also sprinkle them into daily life (e.g., while brushing your teeth or cooking) for extra practice.
Pro Tips for Faster Progress
Use progressive overload—gradually increase reps, sets, or resistance over time.
Train both high reps (endurance) and weighted lower reps (strength).
Stretch calves post-workout to prevent tightness.
For runners, adding calf raises can improve stride efficiency and reduce shin splints.
10. Cool Down: Stretching to Recover
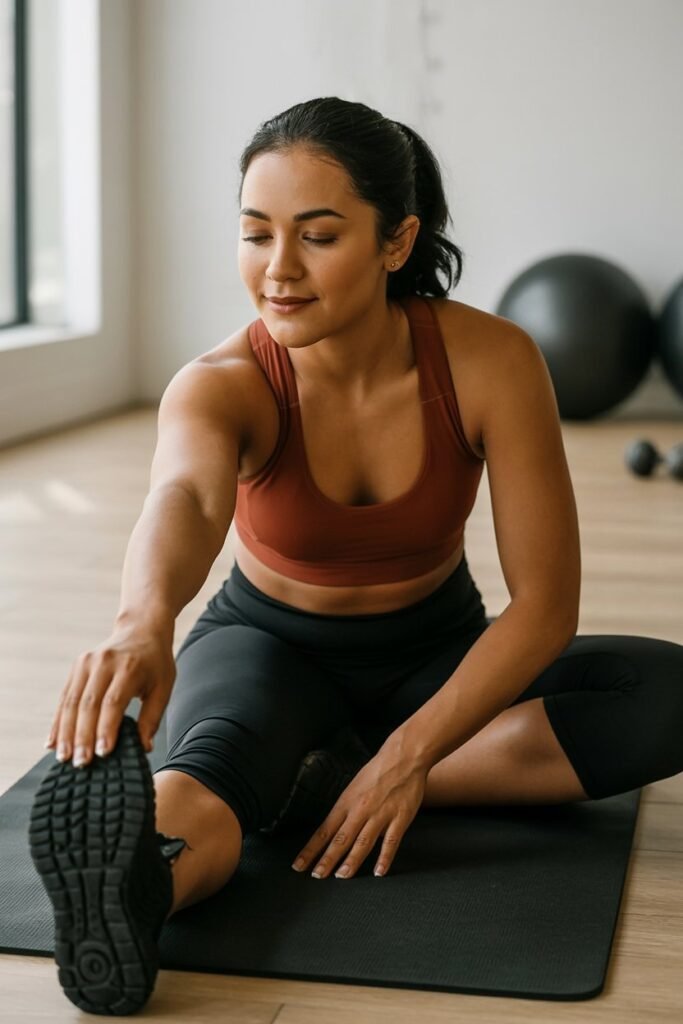
Many people skip the cool-down after a workout, but this simple step is just as important as the exercises themselves.
A proper cool-down with stretching helps your body recover, reduces soreness, and improves flexibility over time.
After working your abs and full body, stretching allows your muscles to relax, your heart rate to gradually return to normal, and your joints to stay healthy.
Think of it as giving your body the care it deserves after pushing through an intense workout. Even 5–10 minutes of stretching can make a big difference in how you feel the next day.
Why Cooling Down Matters
- Reduces muscle stiffness – Stretching helps muscles release tension built up during exercise.
- Improves flexibility & mobility – Regular cool-down stretches make your body more agile.
- Supports recovery – Encourages blood flow and nutrient delivery to tired muscles.
- Prevents dizziness – Cooling down allows your heart rate and breathing to slow gradually.
- Promotes relaxation – A cool-down doubles as stress relief, calming both body and mind.
Best Stretches After an Ab Workout
These stretches target your abs, hips, and lower back—the areas that often tighten after core training:
- Cobra Stretch (Abs Stretch): Lie face down, place hands under shoulders, and press upward, arching your back to stretch the abdominals. Hold for 20–30 seconds.
- Child’s Pose: Sit back on your heels with arms stretched forward on the floor. A great move to release tension in the lower back and hips.
- Seated Forward Fold: Sit with legs extended and reach for your toes. Stretches hamstrings, lower back, and improves flexibility.
- Cat-Cow Stretch: On all fours, alternate arching (cat) and dipping (cow) your spine. This improves spinal mobility and eases tension.
- Hip Flexor Stretch: Kneel on one leg, with the other foot flat in front, and push hips forward slightly. Perfect for releasing tight hip flexors after core or cardio work.
- Torso Twist Stretch: Sit cross-legged, place your right hand on your left knee, and gently twist your torso. Helps stretch obliques and spine.
How to Structure Your Cool-Down Routine
- Spend 5–10 minutes stretching after your workout.
- Hold each stretch for 20–30 seconds, focusing on slow, deep breathing.
- Never force a stretch—ease into it to avoid injury.
- Move slowly between stretches to let your body gradually relax.
Pro Tips for Better Recovery
Pair your cool-down with mindfulness or meditation for mental clarity.
Add foam rolling for extra muscle release and circulation.
Stay hydrated post-workout to flush out toxins and support muscle repair.
If you’re sore, consider light yoga or dynamic stretching the next day.
Tracking Progress and Setting Goals
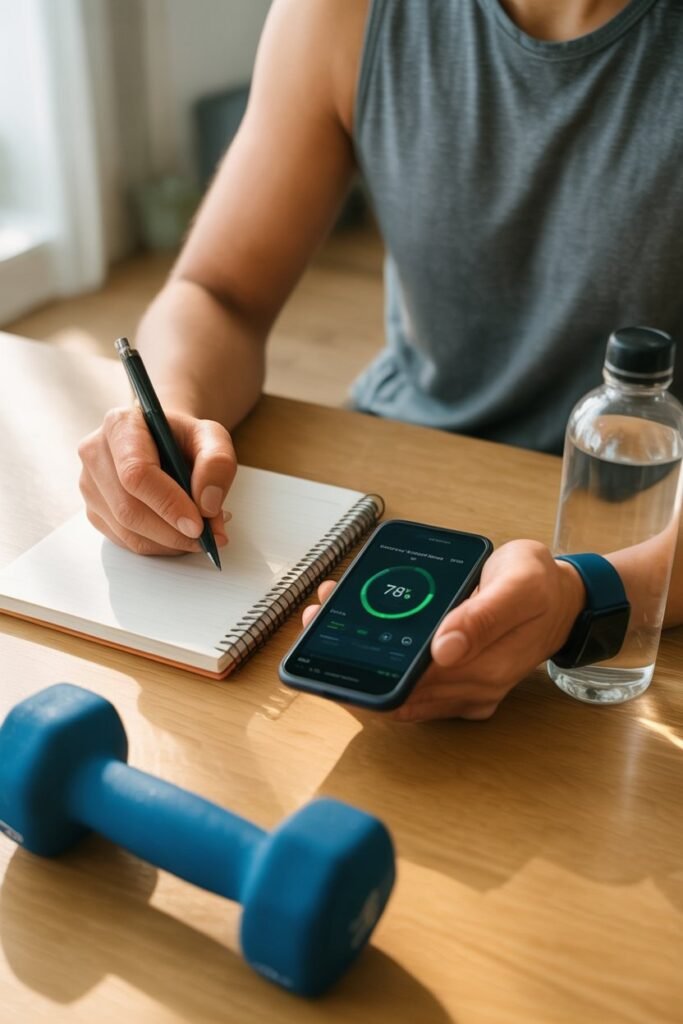
When it comes to building a stronger core or achieving any fitness goal, tracking your progress and setting realistic goals can make all the difference.
Many people work out consistently but don’t see the results they want—not because the exercises don’t work, but because they aren’t measuring their progress or adjusting their routines.
By creating a clear roadmap, you’ll know exactly where you are, where you’re headed, and how to get there.
Why Tracking Your Fitness Progress is Essential
Most people underestimate how important tracking is. If you’re not measuring, you’re guessing. Here’s why keeping tabs on your journey is crucial:
- Accountability: Writing down your workouts or logging them in an app holds you accountable. Skipping a workout becomes harder when you see it on paper.
- Motivation Booster: Seeing small improvements—like an extra 5 reps of crunches or holding a plank 20 seconds longer—keeps you inspired to push forward.
- Avoiding Plateaus: Progress tracking highlights when your body adapts, so you’ll know when to increase intensity, add resistance, or switch exercises.
- Confidence Builder: Looking back at how far you’ve come reminds you that even slow progress is still progress.
Best Ways to Track Your Workouts and Results
You don’t need fancy equipment to track your fitness journey. What matters is consistency. Here are simple yet powerful methods:
- Workout Journal: Write down every workout—exercises, sets, reps, rest times, and how you felt. This gives you a history of your performance.
- Fitness Apps: Apps like MyFitnessPal, Strong, or Fitbit make it easy to track workouts, calories burned, and progress photos.
- Progress Photos: Weekly or bi-weekly pictures from the front, side, and back can reveal changes the scale doesn’t show.
- Body Measurements: Track waist, hips, chest, arms, and thighs every 2–4 weeks. Sometimes inches lost tell a bigger story than pounds lost.
- Performance Goals: Record how long you can hold a plank, how many Russian twists you can do, or how many mountain climbers you can complete in a minute.
- Scale & Body Fat %: While not the only measure, these numbers can be combined with the above methods for a complete picture.
Setting SMART Fitness Goals That Stick
Without a clear goal, it’s easy to drift. That’s why the SMART goal framework is so effective:
- Specific: Instead of saying “I want abs,” set a goal like “I want to reduce my waistline by 2 inches.”
- Measurable: Use metrics like reps, sets, time, or weight. Example: “Hold a plank for 90 seconds.”
- Achievable: Be realistic. If you’re a beginner, aiming for a 10-minute plank in one month isn’t sustainable.
- Relevant: Align your goals with your lifestyle and bigger vision. If you’re training for better health, focus on endurance and strength—not just appearance.
- Time-Bound: Set a timeline. For example: “In 8 weeks, I will complete 3 sets of 20 bicycle crunches without stopping.”
Short-Term vs. Long-Term Goals
Both short-term and long-term goals are important for balance:
- Short-Term Goals (Weekly): Completing three ab workouts per week, improving form, or drinking more water.
- Mid-Term Goals (Monthly): Adding more reps, losing 1–2 inches off your waist, or increasing plank hold time.
- Long-Term Goals (3–6 Months): Visible definition in your abs, improved posture, better endurance, or reduced back pain.
Common Mistakes When Setting Fitness Goals
To avoid frustration, watch out for these pitfalls:
- ❌ Relying only on the scale – Muscle gain can mask fat loss on the scale.
- ❌ Unrealistic deadlines – Expecting abs in two weeks sets you up for failure.
- ❌ Skipping progress tracking – If you don’t measure, you won’t know if you’re improving.
- ❌ Comparing to others – Focus on your journey, not someone else’s highlight reel.
How to Stay Motivated While Tracking Progress
Tracking doesn’t just mean numbers—it’s also about mindset:
- Celebrate small wins (every rep, inch lost, or second gained counts).
- Share your progress with a workout buddy or online community.
- Use visual motivation: sticky notes with goals, progress charts, or before-and-after photos.
- Reward yourself (not with junk food, but with new workout gear, a massage, or a rest day).
Pro Tips for Long-Term Success
Remember: Consistency beats perfection—progress adds up over time.
Combine tracking with journaling your energy levels, sleep, and nutrition.
Review progress every 4 weeks and adjust your plan if needed.
Use both performance goals (strength, endurance) and aesthetic goals (abs, toned waistline).
FAQs:
1. How often should I do these ab exercises?
For best results, aim to train your abs 3–4 times per week. Unlike bigger muscle groups, your core can recover quickly, but it still needs rest.
You can alternate ab-focused days with strength training, cardio, or rest days to avoid overtraining.
2. Do ab workouts burn belly fat?
Not directly. Ab exercises strengthen and define your muscles, but spot reduction is a myth.
To lose belly fat, combine your workouts with a calorie-controlled diet, regular cardio (like HIIT or walking), and full-body strength training.
This combination helps reveal toned abs.
3. How long does it take to see results?
It depends on your starting point, body fat percentage, and consistency.
Most people notice improved core strength in 3–4 weeks and visible definition in 8–12 weeks, provided they stick to proper workouts and nutrition.
4. Can beginners do these ab exercises?
Yes! Each move can be modified for beginners. For example, planks can be done on the knees,
Russian twists can be done without weights, and leg raises can be swapped with bent-knee lifts until strength improves. Over time, progress to the full versions.
5. Do I need equipment for these ab workouts?
No equipment is required. These are bodyweight-friendly moves, which makes them perfect for home workouts.
However, you can add light dumbbells, a medicine ball, or resistance bands if you want to increase intensity.
6. Is it okay to do ab workouts every day?
If you keep the volume low (like a short 5–10 minute routine), daily core activation is fine.
But if you’re doing intense ab workouts, give your muscles at least 24–48 hours to recover for optimal growth and strength.
7. What’s the best time to do ab workouts?
It depends on your schedule and preference. Some people love starting the day with core training, while others add abs at the end of their regular workout.
The key is consistency, not timing.
Conclusion
A strong core is the foundation of a fit and healthy body, and the exercises we covered — from planks and bicycle crunches to leg raises,
Russian twists, and mountain climbers — are some of the most effective ab workouts you can do at home without equipment.
When combined with proper nutrition, regular cardio, and consistency, these moves will not only sculpt your abs but also improve balance, posture, and overall strength.
Remember, visible abs aren’t built overnight — they come from patience, persistence, and lifestyle balance.
Stick with your routine, fuel your body with the right foods, and keep challenging yourself with progressive variations.
Over time, you’ll notice not only a flatter, stronger midsection but also the confidence boost that comes with it.
Your abs are waiting to shine — all you need to do is put in the work.

Great post. I used to be checking continuously this weblog
and I’m impressed! Very helpful information specially the ultimate part
🙂 I take care of such information a lot. I was seeking this certain info for a long time.
Thank you and best of luck.
I have read some good stuff here. Certainly price bookmarking for
revisiting. I surprise how so much effort you place to create such a wonderful informative site.
Hey! This post could not be written any better! Reading this post reminds
me of my previous room mate! He always kept talking about
this. I will forward this page to him. Fairly certain he will have a good read.
Thank you for sharing!
This is my first time visit at here and i am in fact impressed to read everthing at single place.
I think that what you typed was actually very logical.
But, think about this, what if you were to write a killer post title?
I ain’t suggesting your information is not good,
but suppose you added a title to maybe grab folk’s attention? I mean 10 Easy Full
Body Workouts for Beginners at Home – thecoreslim.com is
a little plain. You might glance at Yahoo’s home page and see
how they write post headlines to grab viewers
to open the links. You might add a video or a picture or two to
get readers interested about everything’ve got to say.
In my opinion, it might make your posts a little bit more
interesting.
Hey! I know this is somewhat off topic but I was
wondering if you knew where I could get a captcha plugin for my comment form?
I’m using the same blog platform as yours and I’m having trouble finding one?
Thanks a lot!
Hi my family member! I wish to say that this article is awesome, great written and include approximately all important
infos. I’d like to look extra posts like this .
Hi it’s me, I am also visiting this web page on a regular
basis, this site is really nice and the visitors are genuinely
sharing nice thoughts.
hey there and thank you for your information – I have definitely picked up
something new from right here. I did however expertise a few technical issues using this
site, as I experienced to reload the web site a lot of times previous
to I could get it to load properly. I had been wondering if your hosting is
OK? Not that I am complaining, but slow loading instances times will often affect
your placement in google and could damage your high-quality
score if ads and marketing with Adwords. Well I’m adding this RSS
to my email and could look out for much more of your respective interesting content.
Ensure that you update this again very soon.
Way cool! Some extremely valid points! I appreciate you writing
this post and the rest of the website is also really good.
I don’t even know the way I stopped up right here, but I thought this publish was once good.
I do not recognise who you’re however certainly you’re going to a well-known blogger for those
who aren’t already. Cheers!
I don’t even know how I ended up here, but I thought this post was good.
I do not know who you are but definitely you are going to a famous blogger if you are not already 😉 Cheers!
Awesome website you have here but I was curious about if you knew of any forums that cover the same
topics talked about in this article? I’d really like to be a part of online community where I can get opinions from other
knowledgeable individuals that share the same interest.
If you have any suggestions, please let
me know. Thanks!
At this time it appears like WordPress is the best blogging platform available right now.
(from what I’ve read) Is that what you are using on your blog?
I am sure this piece of writing has touched all the internet people, its really really good piece
of writing on building up new weblog.
That is really attention-grabbing, You are an overly professional blogger.
I have joined your rss feed and look ahead to seeking extra of your magnificent
post. Also, I’ve shared your site in my social networks
Nice post. I used to be checking continuously this
blog and I am impressed! Very helpful info specifically
the ultimate part 🙂 I handle such information a lot.
I used to be seeking this certain information for a long time.
Thank you and good luck.
That is a really good tip especially to those new to the blogosphere.
Short but very precise information… Thank you for sharing this
one. A must read article!
Celebrate your big day in style with our affordable luxury party buses in West Palm Beach. From weddings to proms and other events, enjoy spacious seating, modern amenities, and exceptional service at the best prices. Your unforgettable experience begins with our West Palm Beach party bus rentals. Book today!
다가 사랑자체가 아니기 때문입니다.
Unlock the excitement of Miami’s party bus rentals, featuring affordable options for any occasion. Discover diverse party bus services in Miami, FL, providing convenient and stylish transportation solutions for your event.
Party Bus Miami makes group travel effortless and fun. With options like Miami Bachelor Night Party Bus or Kids Birthday Party Bus Miami, we cater to every event. Affordable, luxurious, and perfect for all celebrations across Miami.
Nothing beats a night on our Bachelor Party Bus Miami. Kick off the groom’s final single night in a fully loaded Bachelor Party Limo Bus Miami. With smooth, secure Miami Bachelor Party Transportation, you can drink and dance worry-free. Trust us for the ultimate Bachelor Party Bus Rental Miami experience.
Rent affordable and luxurious party buses in Boca Raton for weddings, proms, and events. Enjoy stylish interiors, modern features, and excellent service. Book your Boca Raton party bus today and turn your special occasion into an extraordinary experience with top-tier transportation.
Celebrate your birthday in luxury with a Birthday Party Bus Miami. This Luxury Party Bus Miami features top-of-the-line amenities like sound systems, LED lighting, and space for dancing. A DJ Party Bus Miami ensures a fun atmosphere while exploring Miami Nightlife and enjoying exclusive Party on Wheels Miami features.
Homecoming Party Bus Miami adds thrill to the ride. Our Homecoming Dance Party Bus Miami combines elegance with entertainment. Homecoming Party Bus Rental Miami makes your Homecoming Transportation Miami both stylish and safe. Arrive like a VIP in a Miami Homecoming Limo Bus. Rent Party Bus for Homecoming Miami for your big night.
Party Bus Miami offers the ultimate celebration on wheels! Whether it’s a birthday party bus Miami experience, a fun kids party bus Miami trip, a lively Miami Beach party bus ride, or a wild party bus with pole Miami, we’ve got you covered—even for your glamorous prom party bus Miami needs!
In Washington DC, access wheelchair-friendly car services and group transportation choices. From shuttles to general transportation, the capital offers a variety of options to suit your requirements. For upscale transportation experiences, explore KVLIMO’s premier services.
Count on Nassau Bahamas Transportation for personalized service. Whether it’s Nassau Bahamas airport to hotel transport or exploring the island, our island-wide transport Nassau Bahamas and private driver Nassau Bahamas ensure reliable transportation services in Nassau Bahamas.
Enjoy scenic island views with Nassau Shuttle as you head to your destination. Shuttle Airport Nassau offers reliable service and experienced drivers. Nassau Airport Shuttle is the island’s trusted choice.
Enjoy stress-free travel with our Nassau Airport to Atlantis shuttle service and shuttle service Nassau Airport to Cruise Port, offering affordable and reliable options for resort transfers.
Dubai Hummer Limo are professional full services transportation company and we are the best in ajman ,sharjah and Dubai for party, city tour etc…
Mercedes for Rent in Dubai ensures first-class travel with top-of-the-line vehicles. With Dubai Mercedes Rental Service, experience the comfort of Mercedes S Class Rental Dubai and Mercedes Chauffeur Dubai. Rent Luxury Mercedes Car Dubai for a high-end journey.
Step into a world of comfort with Rolls Royce Chauffeur Dubai. Our VIP Transfer Dubai ensures premium Dubai VIP Taxi Service with smooth airport pickups. From Luxury VIP Transfer Dubai to Private VIP Transfers Dubai, we deliver excellence via our elite VIP Chauffeur Service Dubai.
Travel in style with Chauffeur Company Jumeirah. From Executive Chauffeur Jumeirah to Jumeirah Airport Transfer, we offer Reliable Chauffeur Service Jumeirah and Luxury Car Hire Jumeirah for business, leisure, and event transportation.
Enjoy smooth rides with Call Driver in Dubai, offering chauffeur service Dubai, personal driver Dubai, and airport driver service Dubai. Hire a driver in Dubai for hourly or monthly rides, all handled by professional and affordable driver in Dubai experts.
Black Tie Transport specializes in shuttle service from Rancho Cucamonga to LAX, providing affordable LAX shuttle services, private car services, and luxury transportation options. Their reliable airport shuttle service and SUV transportation ensure comfortable Rancho Cucamonga airport transfers, offering a smooth, stress-free journey to LAX and beyond.
Book professional Houston Taxi Service today. From Houston Taxi to Airport and Taxi Service Houston Airport to Airport Taxi Houston, we ensure safe, on-time travel. Our experienced drivers provide convenient, comfortable rides for city trips, airport transfers, and daily commutes anywhere in Houston.
Very quickly this web page will be famous among all blogging users,
due to it’s good content
Hey! Do you know if they make any plugins to assist
with SEO? I’m trying to get my blog to rank for some targeted keywords but I’m not seeing very good
results. If you know of any please share.
Appreciate it!
If you are going for best contents like I do, just pay a quick
visit this site all the time since it presents feature contents, thanks
Hi there! I simply would like to give you a big thumbs up for your great info you have got
right here on this post. I am coming back to
your web site for more soon.
It’s fantastic that you are getting ideas from this piece of writing
as well as from our argument made here.
Greetings! I know this is kind of off topic but I was wondering which blog
platform are you using for this website? I’m getting sick
and tired of WordPress because I’ve had problems with hackers and I’m looking at alternatives for another platform.
I would be awesome if you could point me in the direction of a good platform.