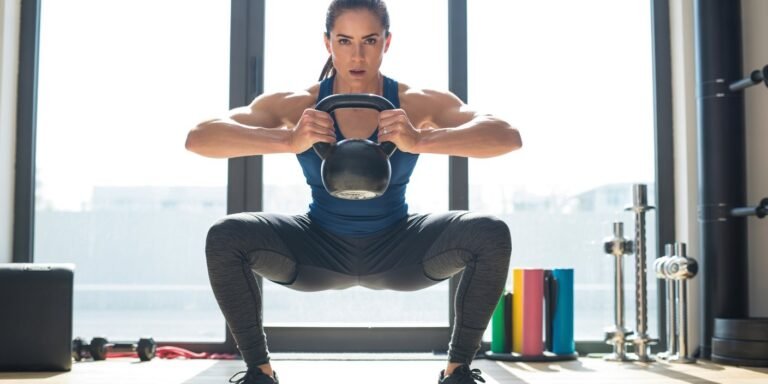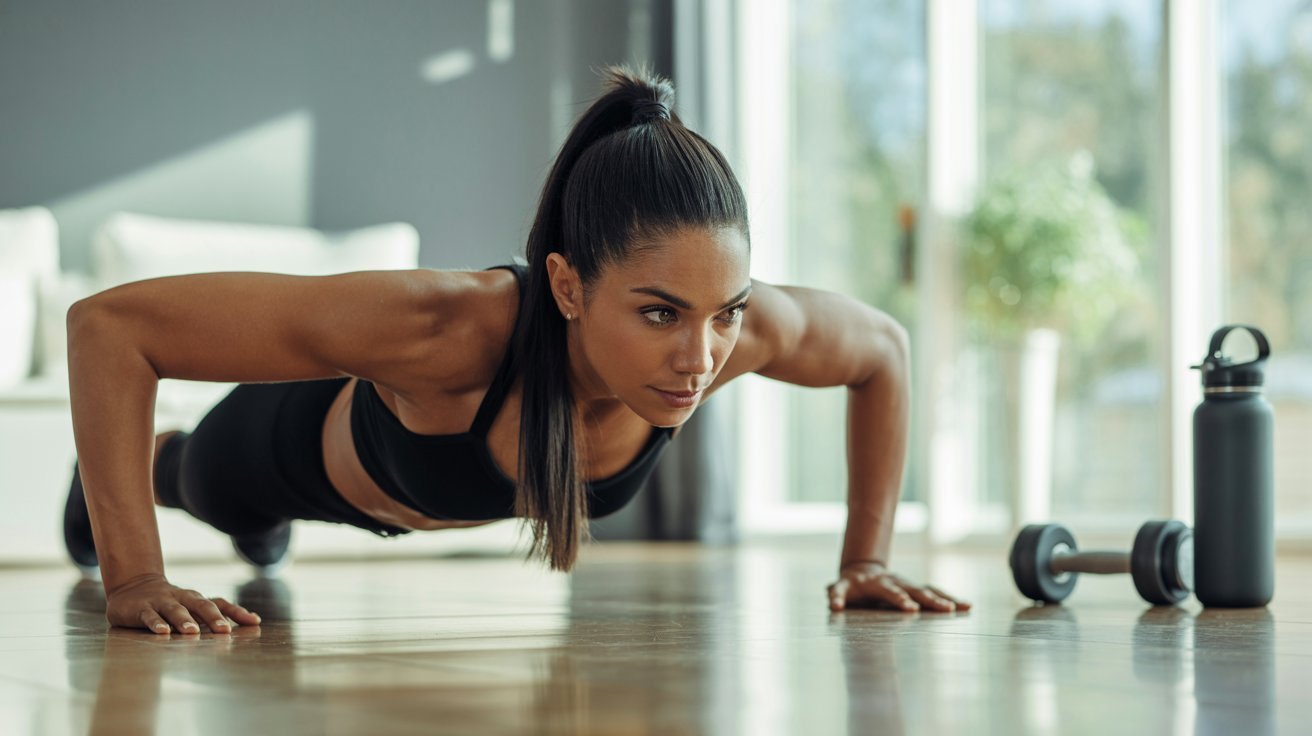
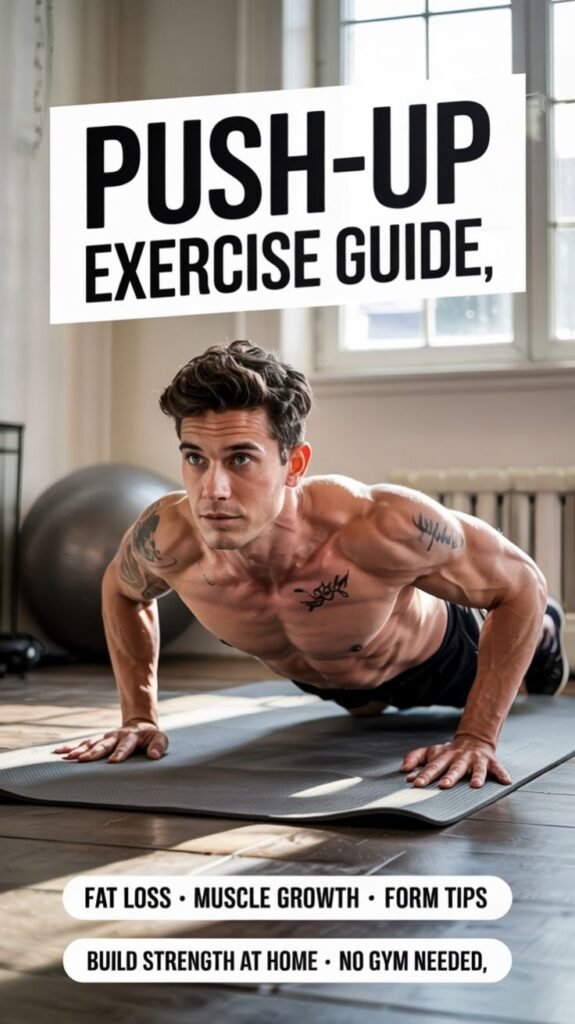
Push-ups are one of the most iconic and effective exercises in the fitness world, yet they are often overlooked or underestimated.
Despite their simplicity, push-ups are a powerhouse movement that can dramatically improve your overall strength, stability, and physique.
Whether you’re a total beginner just starting your fitness journey or an advanced athlete looking to challenge your upper body, push-ups offer benefits that few exercises can match — all without requiring any equipment or gym membership.
At their core, push-ups are a compound bodyweight exercise. That means they engage multiple muscle groups at the same time.
When you perform a standard push-up, you’re working your chest, shoulders, triceps, and core simultaneously.
But that’s not all — your glutes, back, and even legs are recruited to stabilize your body, making this a full-body movement that builds functional strength.
Over time, consistent push-up training can help you develop lean muscle, improve posture, enhance athletic performance, and even reduce the risk of injury in daily activities.
What makes push-ups so versatile is how easily they can be adapted to your fitness level and goals.
Beginners can start with wall push-ups or knee push-ups, while intermediate and advanced exercisers can progress to incline, decline, diamond, or explosive push-ups to further challenge strength, endurance, and power.
There’s virtually no limit to the ways you can modify this simple movement, making it suitable for anyone, anywhere.
From strengthening your upper body for everyday activities to enhancing your physique for aesthetic goals, push-ups deliver consistent results when done correctly and progressively.
Beyond strength, push-ups also train your body to move efficiently. They improve shoulder stability, engage your core for balance, and strengthen your wrists and joints when performed with proper form.
This makes push-ups an excellent addition not only to strength training routines but also to functional fitness, sports performance, and even rehabilitation programs.
In this ultimate guide, we’ll break down everything you need to know about push-ups: the science-backed benefits, step-by-step instructions for perfect form, common mistakes to avoid, essential variations to challenge every fitness level, and pro tips to help you get the most out of every rep.
By the end of this guide, you’ll have a deep understanding of why push-ups remain a timeless, indispensable exercise and how to integrate them into your daily routine for maximum results.
Whether your goal is building strength, toning your upper body, burning calories, or simply feeling more confident in your physical abilities, push-ups are a foundational exercise that can help you achieve it all.
With dedication, proper technique, and consistency, the humble push-up can transform not only your body but also your confidence and approach to fitness.
Amazon Gear to Master Push-Ups & Build Upper-Body Strength I Recommend
Want to Perfect Your Push-Ups and Build Serious Upper-Body Power?
Push-ups are one of the best exercises for strength, tone, and endurance — and the right gear helps you perform better, stay comfortable, and track your progress.
Here are my top Amazon picks for making your push-up workouts more effective and enjoyable.
| Product | Why You’ll Love It | Shop Now |
|---|---|---|
| Push-Up Bars / Handles (Non-Slip) | Reduces wrist strain and increases range of motion for deeper, safer push-ups. | Check Price on Amazon |
| Adjustable non resistance band | Adds extra resistance to push-ups for muscle growth and challenge. | View on Amazon |
| Workout Gloves (Breathable Grip) | Protects hands and improves grip during push-ups and floor work. | Shop Now |
| Non-Slip Exercise Mat | Provides comfort and stability for any push-up variation. | Buy on Amazon |
| Weighted Vest (Adjustable) | Boosts intensity, helping you build strength and muscle faster. | See Details |
| Smart Fitness Tracker / Watch | Tracks reps, heart rate, and calories burned during workouts. | Shop Now |
| Foam Roller or Massage Ball | Relieves post-workout tension in your shoulders, arms, and chest. | View on Amazon |
These push-up essentials help you perfect your form, increase strength, and challenge yourself with every rep — whether you’re a beginner or advanced.
Benefits of Push-Ups
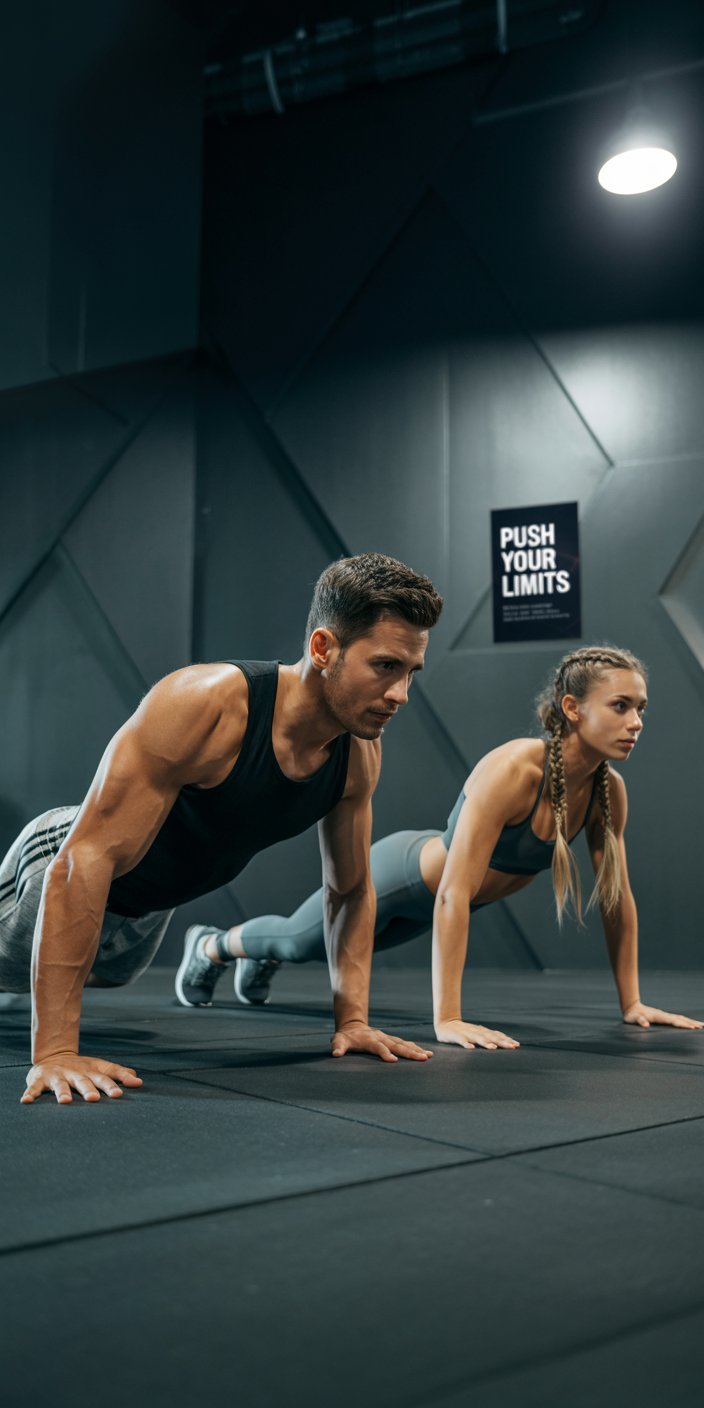
Push-ups are one of the most effective and versatile bodyweight exercises you can do anywhere, anytime—no equipment required.
They’re a classic move for a reason: push-ups strengthen multiple muscle groups at once, improve stability, and support long-term health and fitness goals.
Whether you’re a beginner or advanced, adding push-ups to your routine can transform your upper body strength, core stability, and overall endurance.
1. Builds Upper Body Strength
Push-ups target major upper-body muscles including the chest (pectorals), shoulders (deltoids), and triceps.
With regular practice, you’ll notice stronger arms, a more defined chest, and improved pushing strength that carries over into daily tasks like lifting, pushing, or carrying.
2. Strengthens the Core
Unlike isolation exercises, push-ups require your core to engage throughout the movement.
Your abs, obliques, and lower back muscles work hard to stabilize your body, improving posture and balance while also contributing to a more defined midsection
3. Improves Functional Fitness
Push-ups mimic natural movement patterns, making them excellent for functional strength.
They help prepare your body for real-life activities such as pushing a door, carrying groceries, or even getting up from the ground with ease.
4. Enhances Cardiovascular Health
When done in higher reps or as part of a circuit, push-ups also raise your heart rate, giving you a cardio boost while building strength.
This helps improve endurance and supports fat-burning, making push-ups a great addition to weight-loss routines
5. Boosts Bone and Joint Health
Push-ups are a form of weight-bearing exercise, which strengthens bones and helps maintain joint stability.
They also promote shoulder mobility and strengthen stabilizer muscles, reducing the risk of injuries over time.
6. Increases Mental Toughness and Discipline
Push-ups can be physically demanding, but they also train your mental grit.
Sticking to a push-up routine builds discipline, resilience, and confidence—qualities that extend beyond fitness into everyday life.
7. Versatility for All Fitness Levels
Push-ups are easily adaptable:
- Beginners can start with wall push-ups or knee push-ups.
- Intermediate exercisers can perform standard or incline push-ups.
- Advanced athletes can challenge themselves with variations like diamond push-ups, plyometric push-ups, or weighted push-ups.
This makes push-ups suitable for everyone, regardless of fitness level.
8. No Equipment Needed
One of the biggest benefits is accessibility. Push-ups require zero equipment, meaning you can do them at home, outdoors, or even while traveling.
Consistency becomes easier when you have an exercise you can perform anywhere.
Proper Push-Up Form

Performing push-ups correctly is crucial to prevent injury and maximize effectiveness. Follow these steps:
- Start in a plank position – Hands should be shoulder-width apart, aligned with your chest.
- Keep your body straight – Engage your core and avoid sagging your hips or arching your back.
- Lower yourself down – Bend your elbows and lower your chest until it’s a few inches from the floor.
- Push back up – Extend your arms fully without locking your elbows.
- Breathe properly – Inhale as you go down, exhale as you push up.
Common Push-Up Mistakes & How to Fix Them

Push-ups may look simple, but performing them incorrectly can reduce their effectiveness and even lead to discomfort or injury.
Many people make small mistakes without realizing it, which prevents them from engaging the right muscles and seeing real progress.
The good news? With a few adjustments, you can fix these errors and unlock the full benefits of push-ups. Here are the most common mistakes and how to correct them:
1. Dropping or Sagging Hips
The Mistake: Letting your hips sink toward the floor puts extra strain on your lower back and removes tension from your core.
How to Fix It: Keep your core tight and imagine forming a straight line from your head to your heels. Engage your abs and glutes to stabilize your hips.
2. Flaring Out Elbows
The Mistake: Allowing your elbows to point outward at a 90° angle stresses the shoulders and reduces chest activation.
How to Fix It: Keep elbows tucked at about a 45° angle from your torso. This protects your shoulders and increases chest and triceps engagement.
3. Not Going Low Enough
The Mistake: Doing half reps (barely bending your arms) limits range of motion and muscle activation.
How to Fix It: Lower your body until your chest is just above the ground (or arms form about a 90° angle). Use controlled movement instead of rushing.
4. Incomplete Lockout at the Top
The Mistake: Stopping before fully extending your arms reduces the strength-building benefits.
How to Fix It: Press all the way up until your arms are straight, shoulders engaged, and core tight. Don’t lock out by dumping weight into your joints—stay active.
5. Poor Hand Placement
The Mistake: Placing hands too wide or too narrow strains wrists and shoulders, throwing off form.
How to Fix It: Position your hands slightly wider than shoulder-width apart, directly under your shoulders. Fingers should point forward for optimal support.
6. Neck Dropping or Looking Up
The Mistake: Dropping your head or craning your neck up can cause strain and misalign the spine.
How to Fix It: Keep your neck neutral by gazing slightly ahead of you, not down at your chest or up at the ceiling. Think of your body as one long plank.
7. Rushing Through Reps
The Mistake: Performing push-ups too quickly leads to sloppy form and reduced muscle activation.
How to Fix It: Slow down. Lower yourself in 2–3 seconds, pause briefly at the bottom, and press back up with control. Quality beats quantity.
8. Forgetting to Breathe
The Mistake: Holding your breath while pushing up reduces stamina and energy.
How to Fix It: Inhale as you lower your body, exhale as you press back up. Controlled breathing improves endurance and keeps your muscles fueled.
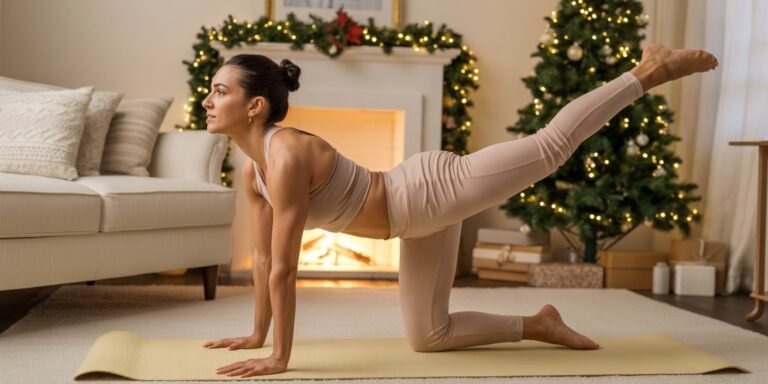
Push-Up Variations for All Levels
Beginner Variations
Push-ups are a powerful strength-building exercise, but for beginners, starting with the standard push-up can feel overwhelming.
The good news is, you don’t have to master a full push-up right away.
By using beginner-friendly variations, you can build strength, improve form, and gradually work your way toward more advanced versions.
These progressions also help prevent injuries and keep your motivation high as you see steady improvements.
Here are some beginner push-up variations to get you started:
1. Wall Push-Ups
This is the easiest variation and perfect for absolute beginners. Stand facing a wall, place your palms flat on it at shoulder height, and step your feet back slightly.
Bend your elbows as you bring your chest toward the wall, then push back.
- Why it helps: Reduces the load on your arms and chest while teaching proper alignment.
- Pro tip: Keep your body straight and avoid letting your hips sag.
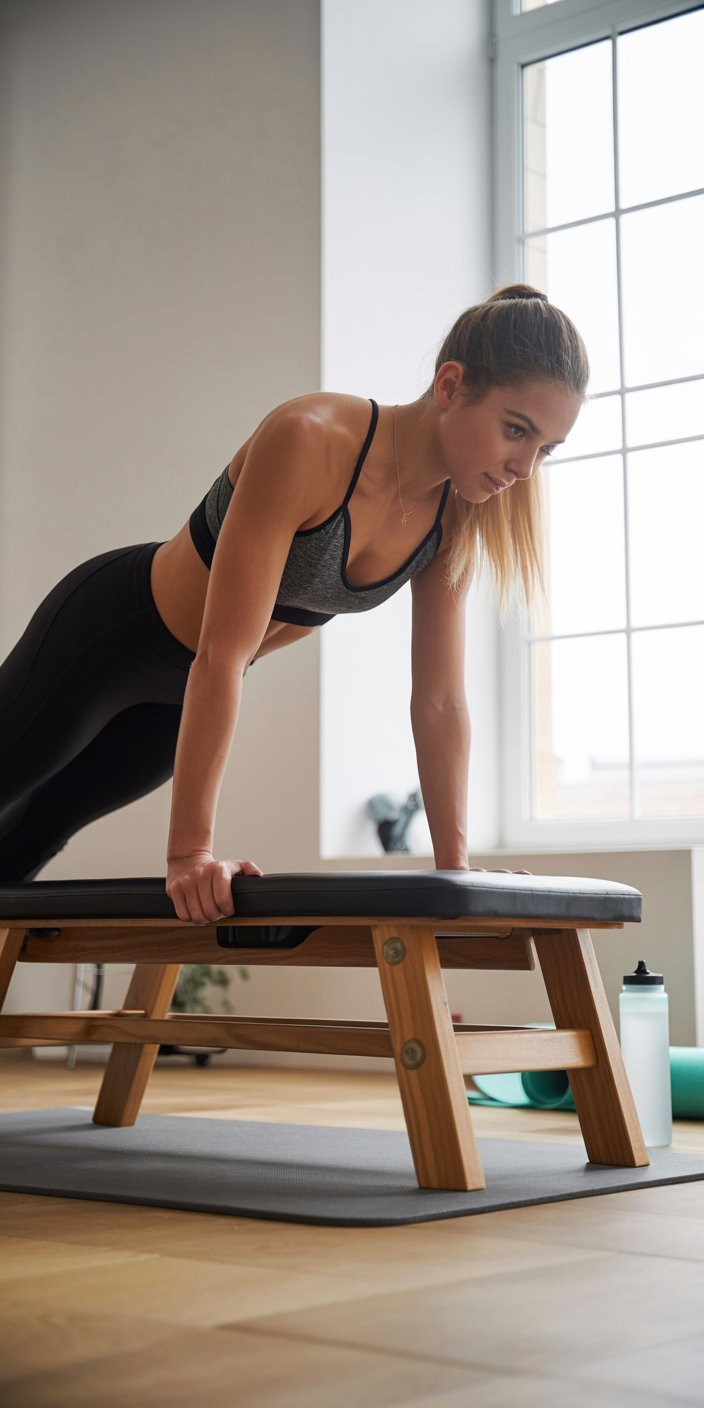
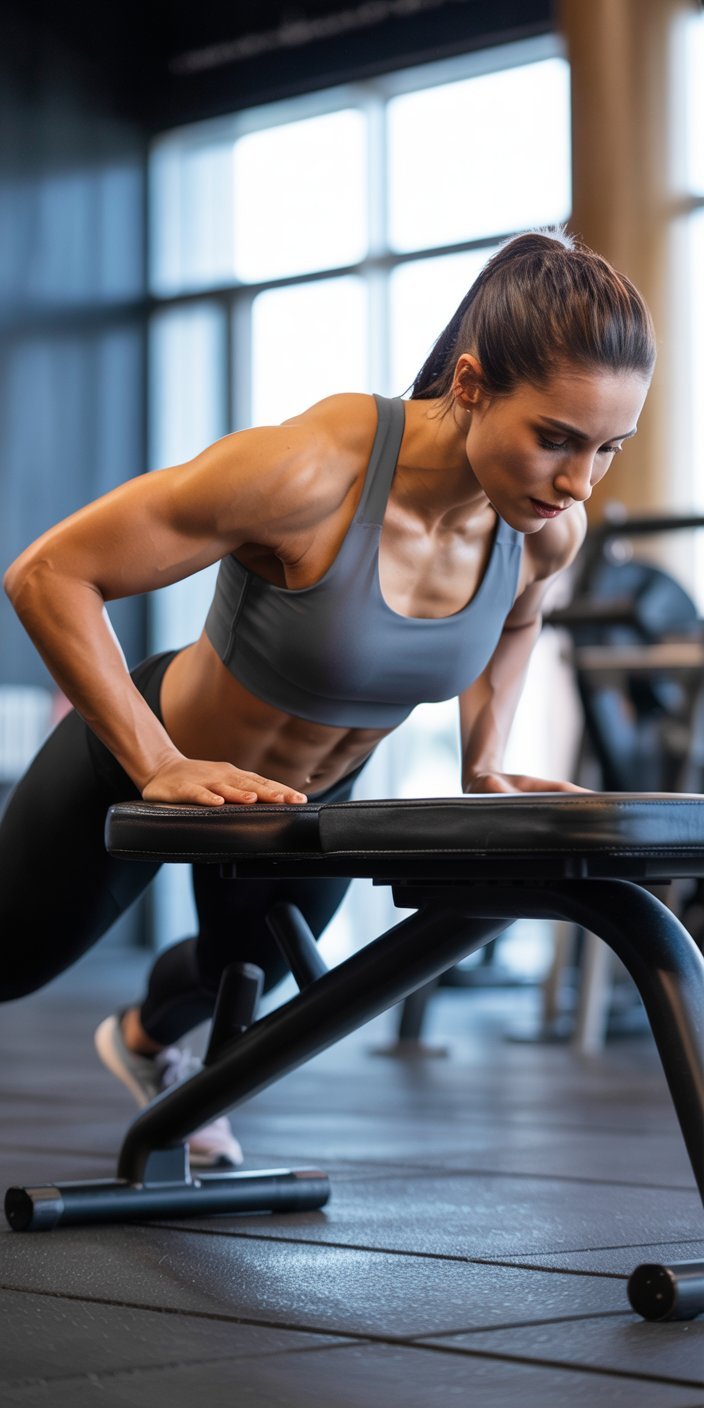
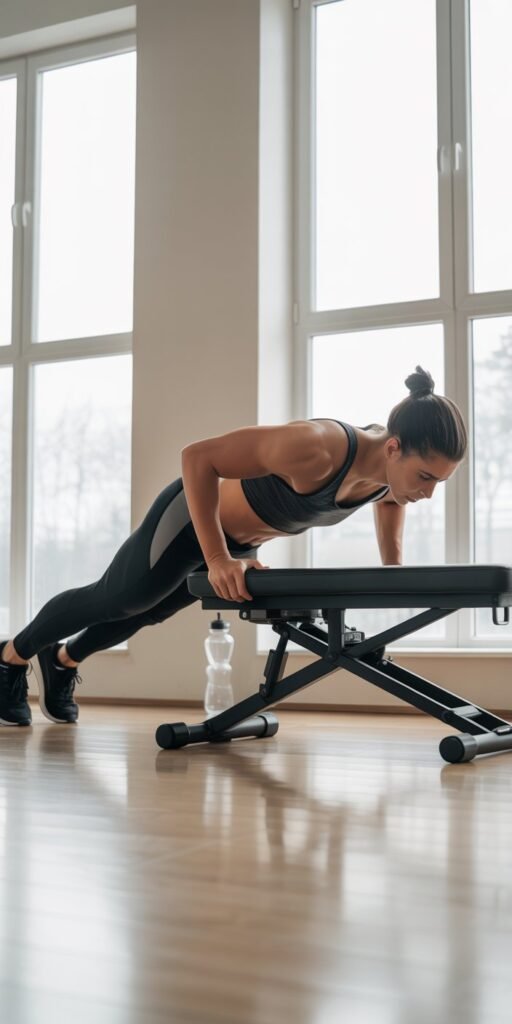
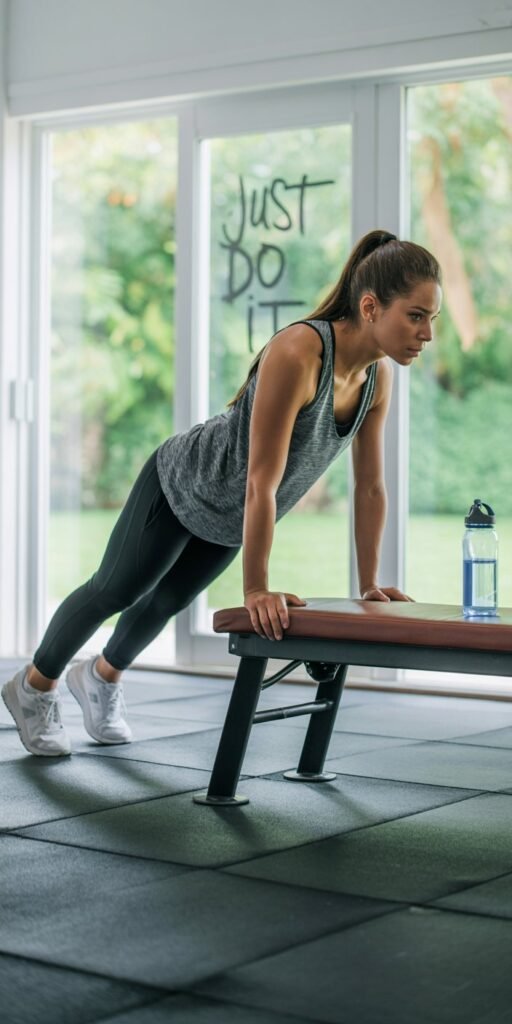
2. Incline Push-Ups (on a Bench or Table)
Perform push-ups against a sturdy elevated surface like a bench, table, or couch. The higher the surface, the easier the push-up.
- Why it helps: Builds strength in your chest and arms without the full bodyweight challenge.
- Pro tip: Gradually lower the incline as you get stronger to increase difficulty.
3. Knee Push-Ups
Start in a high plank position but keep your knees on the ground. Lower your chest toward the floor while keeping your back straight and core engaged.
- Why it helps: Cuts down on the weight you’re pushing, making it more manageable.
- Pro tip: Don’t arch your lower back—focus on moving your chest, not your hips.
4. Negative (Eccentric) Push-Ups
Begin in a high plank and slowly lower yourself to the ground, taking 3–5 seconds to descend. Instead of pushing back up, reset and repeat.
- Why it helps: Strengthens the lowering phase, which builds muscle and preps you for full push-ups.
- Pro tip: Keep your core tight to control the descent.
5. Box Push-Ups (Hands on Floor, Knees Bent on Box/Step)
Place your hands on the ground and rest your bent knees on a box, bench, or step. Perform push-ups from this supported position.
- Why it helps: Bridges the gap between knee push-ups and full push-ups.
- Pro tip: Maintain a straight line from shoulders to knees.
How to Progress as a Beginner
- Start with wall push-ups or incline push-ups if you’re completely new.
- Move to knee push-ups once you feel stronger.
- Incorporate negative push-ups to build pressing strength.
- Work toward your first standard push-up by combining these variations 2–3 times per week.
Remember, progress takes consistency. Even if you can only do a few reps, you’re building the foundation for more advanced push-up variations later.
Intermediate Variations
Once you’ve mastered the beginner versions and can comfortably perform standard push-ups with good form, it’s time to step up the challenge.
Intermediate push-up variations not only build more strength and muscle definition but also improve your stability, balance, and endurance.
These variations are perfect for anyone who wants to push beyond the basics and start sculpting an athletic upper body.
Here are some intermediate push-up variations to add to your workouts:
1. Diamond (Close-Grip) Push-Ups
Place your hands close together under your chest, forming a diamond shape with your thumbs and index fingers. Lower your chest toward your hands, then push back up.
- Focus: Triceps, chest, and inner chest development.
- Pro Tip: Keep your elbows tucked close to your body for maximum tricep activation.
2. Decline Push-Ups
Put your feet on an elevated surface like a bench, box, or step, while your hands stay on the floor. Perform push-ups in this position.
- Focus: Upper chest, shoulders, and core stability.
- Pro Tip: Don’t let your lower back arch—brace your core throughout the movement.
3. Shoulder Tap Push-Ups
Start with a standard push-up. At the top, lift one hand and tap the opposite shoulder, then perform the next rep. Alternate sides each time.
- Focus: Chest, arms, shoulders, and anti-rotational core strength.
- Pro Tip: Move slowly during the shoulder tap to avoid swaying your hips.
4. Wide-Grip Push-Ups
Set your hands wider than shoulder-width apart and perform push-ups as usual.
- Focus: Outer chest and shoulders.
- Pro Tip: Don’t go excessively wide—too much strain on your shoulders can lead to injury.
5. Plyometric (Explosive) Push-Ups
Lower yourself down and push up with enough force that your hands briefly leave the ground. You can start small with just a little lift and progress to clapping push-ups.
- Focus: Power, speed, and explosive chest/arm strength.
- Pro Tip: Land softly and control the movement to protect your wrists.
6. Spiderman Push-Ups
As you lower into a push-up, bring one knee toward the elbow on the same side, then return to start. Alternate legs each rep.
- Focus: Chest, triceps, core, and hip mobility.
- Pro Tip: Keep your movements controlled—don’t rush through.
7. Staggered-Hand Push-Ups
Place one hand slightly forward and the other slightly back, then perform push-ups. Switch sides halfway through your set.
- Focus: Uneven load builds unilateral strength and stability.
- Pro Tip: Keep your torso squared and avoid twisting.
How to Progress with Intermediate Push-Ups
Moving from intermediate push-ups to advanced levels isn’t just about doing more reps—it’s about building strength, endurance, control, and muscle mind connection.
If you rush, you risk sloppy form or injury. Instead, use a smart progression plan to maximize results and set yourself up for advanced push-up mastery.
Here’s how to safely and effectively progress with intermediate push-ups:
1. Master Perfect Form First
Before adding reps or difficulty, make sure every rep looks clean:
- Keep your body in a straight line (no sagging hips or arched back).
- Lower until your chest nearly touches the ground.
- Engage your core and glutes for stability.
Quality over quantity—10 clean push-ups are more valuable than 25 sloppy ones.
2. Increase Reps & Sets Gradually
Start with 8–12 reps per variation and increase as you get stronger.
- Example: Go from 3 sets of 10 reps → 3 sets of 15 reps.
- Once you can hit the top range with ease, move to harder variations.
3. Use Time Under Tension (TUT)
Slowing down increases intensity and muscle activation.
- Try 3-second lowers, pause at the bottom, then push up explosively.
- This builds strength without needing extra equipment.
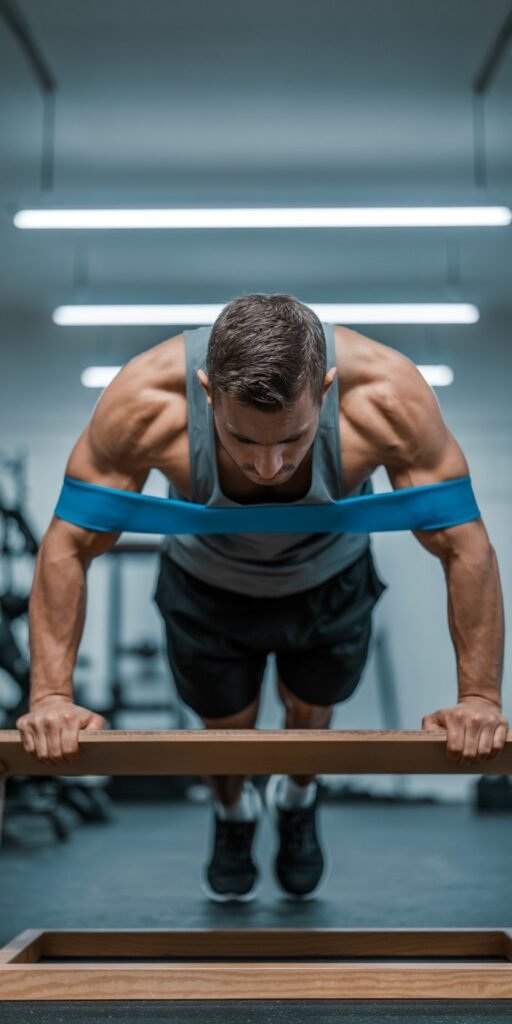
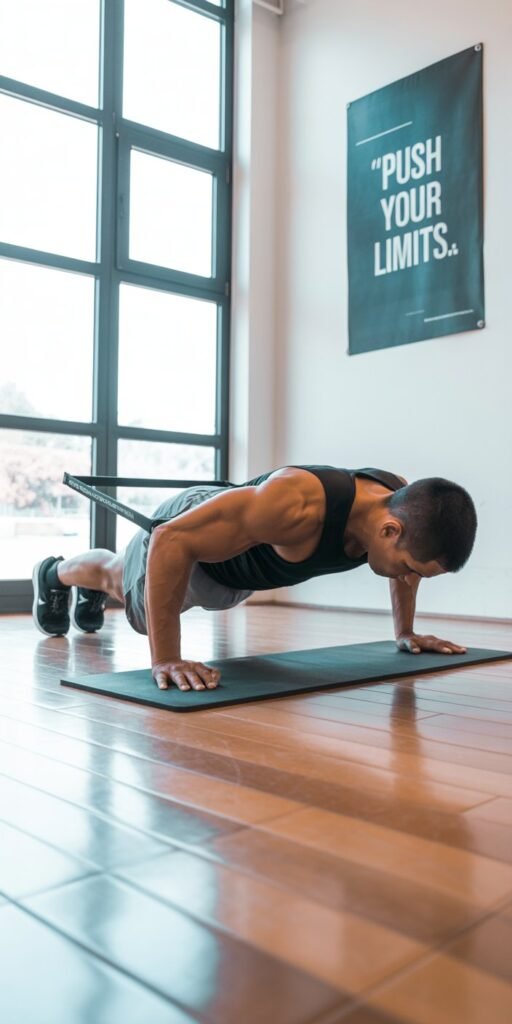
4. Add Intensity with Resistance
- Use a weighted vest, backpack with books, or resistance bands for added load.
- This mimics progressive overload, just like in weight training.
5. Train Different Angles
Cycle through variations to challenge your chest, triceps, shoulders, and core from multiple angles:
- Decline push-ups for upper chest
- Diamond push-ups for triceps
- Wide-grip push-ups for outer chest
This ensures balanced development.
6. Incorporate Plyometric Moves
Explosive push-ups (like clapping push-ups) build power and prep you for advanced variations. Start small, then progress as your strength grows.
7. Set Strength Benchmarks
Aim for these milestones before moving to advanced push-ups:
- 20 clean standard push-ups in a row
- 15+ diamond push-ups without losing form
- 12+ decline push-ups with control
- Comfortably completing plyometric push-ups
These numbers show you’ve built the base strength needed.
Key Takeaway
Progressing with intermediate push-ups is about control, consistency, and challenge. Don’t just add reps—experiment with tempo, resistance, and new angles.
This approach keeps your workouts exciting and ensures you build the strength foundation for advanced moves like archer push-ups, one-arm push-ups, or planche progressions.
How to Progress in Push-Ups
Push-ups are one of the most versatile bodyweight exercises. They can be made easier for beginners or harder for advanced athletes.
The key is to progress strategically, so you keep building strength, muscle, and endurance without hitting a plateau.
Here’s a step-by-step guide on how to progress in push-ups no matter your starting point:
1. Start with the Basics
If standard push-ups feel too challenging, begin with:
- Wall Push-Ups → Standing and pushing against a wall.
- Incline Push-Ups → Hands on a bench, couch, or sturdy surface to reduce resistance.
- Knee Push-Ups → On your knees with hips forward, keeping core engaged.
These variations teach you proper form while building foundational strength.
2. Master the Standard Push-Up
Once you can do 10–15 incline or knee push-ups with ease, move to the classic push-up on the floor. Focus on:
- Keeping a straight line from head to heels.
- Lowering until your chest nearly touches the floor.
- Engaging your core to avoid sagging hips.
Mastering this step ensures you’re ready for more advanced variations.
3. Increase Reps & Sets
The simplest way to progress is to add volume. For example:
- Start with 3 sets of 8 reps → Progress to 3 sets of 15–20 reps.
- Gradually reduce rest time between sets for extra challenge.
4. Slow Down the Tempo
Control creates intensity. Try:
- 3-second lowers (eccentric push-ups).
- Pausing at the bottom for 1–2 seconds before pressing up.
This builds strength and stability while improving mind-muscle connection.
5. Experiment with Hand & Foot Positions
Changing angles works new muscle groups:
- Wide-Grip Push-Ups → Emphasize chest.
- Diamond Push-Ups → Torch triceps.
- Decline Push-Ups → Focus on upper chest and shoulders.
- Staggered Hands → Build unilateral strength and stability.
6. Add Resistance for Growth
Progressive overload is key for muscle gains. Try:
- Wearing a weighted vest.
- Placing a resistance band around your back and holding it with your hands.
- Filling a backpack with books for added weight.
7. Incorporate Explosive Movements
Power-focused push-ups push you into advanced training:
- Clap Push-Ups
- Plyometric Push-Ups (hands leave the ground)
These improve strength, speed, and athletic performance.
8. Set Progression Milestones
Advanced Goal: Mastering one-arm push-ups, archer push-ups, or planche progressions.
Beginner Goal: 10–15 standard push-ups with clean form.
Intermediate Goal: 25–30 push-ups in a row.
Push-Up Challenge for Beginners
If you’re just starting out on your fitness journey, a push-up challenge is one of the best ways to build strength, confidence, and consistency.
Push-ups don’t require any equipment, they target multiple muscle groups at once, and they help improve posture and core stability.
The goal of this challenge is to start small, progress steadily, and finish stronger than you thought possible.
Here’s a structured 30-day push-up challenge designed specifically for beginners:
Week 1: Build the Foundation
Focus on learning proper form and easing your body into the movement.
- Day 1–3: 3 sets of 5–8 push-ups (or knee push-ups if standard is too hard).
- Day 4: Rest or active recovery (walking, stretching).
- Day 5–7: 3 sets of 6–10 push-ups.
By the end of week 1, you should be comfortable with push-up mechanics and feel less strain.
Week 2: Increase Reps & Confidence
Start pushing your limits while maintaining form.
- Day 8–10: 3 sets of 8–12 push-ups.
- Day 11: Rest day.
- Day 12–14: 3 sets of 10–14 push-ups.
You’ll begin to feel stronger in your chest, arms, and core.
Week 3: Challenge Your Endurance
Now it’s time to raise the intensity with higher reps.
- Day 15–17: 3 sets of 12–15 push-ups.
- Day 18: Rest day.
- Day 19–21: 3 sets of 14–18 push-ups.
At this stage, you’ll notice real progress in both strength and stamina.
Week 4: Push Your Limits
Finish strong by testing your endurance and max strength.
- Day 22–24: 3 sets of 16–20 push-ups.
- Day 25: Rest day.
- Day 26–29: 3 sets of as many push-ups as you can (aim for 18–25 per set).
- Day 30: Final test – Do as many push-ups in a row as possible.
Celebrate your progress and compare your day 1 numbers to your final test. Most beginners double or even triple their reps by the end of the challenge.
Tips for Success in the Challenge
✅ Focus on form, not just reps. Keep your core tight, back straight, and chest lowering close to the floor.
✅ Breathe correctly. Inhale as you go down, exhale as you push up.
✅ Listen to your body. If needed, drop to knee push-ups to finish your sets.
✅ Stay consistent. The real results come from showing up every day.
The Payoff
By completing this 30-day push-up challenge, you’ll build:
More endurance and confidence in your bodyweight strength
Stronger arms, chest, and shoulders
A tighter core and improved stability
FAQ
1. Can beginners really do push-ups?
Yes! Push-ups are adaptable for all levels. If standard push-ups feel too difficult, start with wall push-ups, incline push-ups, or knee push-ups until you build enough strength to perform them on the floor.
2. How many push-ups should I start with if I can barely do one?
If you struggle with even a single push-up, start with wall or incline push-ups and aim for 5–8 reps per set.
Over time, your muscles will get stronger, and you’ll transition to standard push-ups.
3. Should I do push-ups every day?
Not necessarily. While consistency is important, your muscles need time to recover. This is why the 30-day challenge includes rest days.
Training 5–6 days per week with rest built in is more effective than daily overtraining.
4. Will push-ups help me lose weight?
Push-ups alone won’t guarantee weight loss, but they burn calories, increase muscle mass, and boost metabolism.
Combined with a healthy diet and regular cardio, they can definitely support weight loss goals.
5. Can push-ups build muscle like weightlifting?
Yes—push-ups build muscle in your chest, shoulders, triceps, and core.
However, if your goal is maximum muscle growth, you’ll eventually need to add resistance (weighted vest, bands, or progression to advanced push-ups) to keep challenging your body.
6. What if my wrists hurt during push-ups?
Wrist pain is common, especially for beginners. Try:
- Warming up wrists with stretches.
- Placing hands on dumbbells or push-up bars to keep wrists straight.
- Strengthening forearms and grip over time.
7. How fast will I see results from the challenge?
Most beginners notice progress within 2–3 weeks, including improved strength, more reps, and tighter core stability.
Visible muscle definition usually appears after consistent training for 6–8 weeks, especially if paired with good nutrition.
8. Can women do this push-up challenge too?
Absolutely! Push-ups are for everyone.
In fact, many women benefit from push-ups because they strengthen the upper body, improve posture, and help with functional strength for daily activities.
9. What should I do after completing the 30-day challenge?
Once you finish, you can:
- Repeat the challenge with higher reps.
- Try intermediate or advanced push-up variations.
- Incorporate push-ups into a full-body strength training program.
10. Do I need any equipment for this challenge?
No equipment is required—just your bodyweight and some floor space. However, using a yoga mat or exercise mat can make training more comfortable.
Conclusion
The push-up is one of the simplest yet most powerful exercises you can add to your fitness journey.
With just your bodyweight, you can strengthen your chest, arms, shoulders, and core while improving endurance, balance, and overall athletic performance.
This beginner-friendly 30-day push-up challenge isn’t just about building muscle—it’s about creating discipline, building confidence, and proving to yourself that progress is always possible when you stay consistent.
Even if you start with just a few wall push-ups or knee push-ups, sticking with the plan will help you steadily improve until you can perform full sets of standard push-ups with ease.
By the end of the challenge, you’ll notice not only physical changes—like stronger arms, better posture, and a tighter core—but also mental changes, such as more energy, motivation, and belief in your ability to take on harder challenges.
Bottom line: Push-ups are more than an exercise; they’re a foundation for lifelong strength.
Start today, stay committed, and let this challenge be the stepping stone to even greater fitness goals.